UPDATE w_zshop_goods_sku_images SET path = REPLACE(path, ‘http://qq.com’,’https://qq.com’);
UPDATE w_zshop_commodities SET details = REPLACE(details, ‘http://qq.com’,’https://qq.com’);
UPDATE w_zshop_commodities SET params = REPLACE(params, ‘http://qq.com’,’https://qq.com’);
UPDATE w_users SET profile = REPLACE(profile, ‘http://qq.com’,’https://qq.com’);
UPDATE w_zshop_banners SET pic = REPLACE(pic, ‘http://qq.com’,’https://qq.com’);
UPDATE w_zshop_order_coms SET pic = REPLACE(pic, ‘http://qq.com’,’https://qq.com’);
coturn 添加redis实现对转发流量和转发时长的统计
前言
虽然已经用 coturn 来作为 webrtc 的转发服。 但是我们只做了一个最基本的静态key的加密校验而已。但是对于转发的流量和转发的时长,却没法统计。
但是事实上,对于转发的流量和时长对于我们的业务来说是非常必要的。
刚好 coturn 有提供了一个统计的redis配置,redis-statsdb,这个是就是 turnserver 会将一些统计的数据存到 redis 中。 然后我们去取就行了。
所以要在配置文件里面加上这一个配置:
| 1 | redis-statsdb=”ip=59.57.xx.xx dbname=13 port=6379 connect_timeout=30″ |
具体文档:
-O, –redis-statsdb Redis status and statistics database connection string, if used (default – empty, no Redis stats DB used). This database keeps allocations status information, and it can be also used for publishing and delivering traffic and allocation event notifications. The connection string has the same parameters as redis-userdb connection string.https://github.com/coturn/coturn/wiki/turnserver
也就是这个参数是用来做状态统计的。 可以用来发布和传递流量, 还有断开和连接的webhook通知。通过这个统计的redis db,我们可以得到这一次转发的开始时间,结束时间,以及转发的流量。
大概的一个截图就是:

这边还有更详细的说明: schema.stats.redis
状态的key就是:
| 1 | turn/user/<username>/allocation/<id>/status |
举例:
| 1 | turn/realm/pano/user/1531994598:fe909a0a4cde20be0a7bb9fbfdc8d6dc_21_24_18154723/allocation/003000000000002028/status |
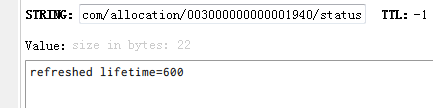
他的值有可能是 new lifetime=… 或者是 refreshed lifetime=…
一个用户名下可能有多个状态。
然后是订阅:
- 通过订阅: turn/realm/*/user/*/allocation/*/status 这个主题,可以得到一些事件,比如 deleted 事件
- 通过订阅: turn/realm/*/user/*/allocation/*/traffic 这个主题,可以得到一些信息,比如流量, 当这个配置被删除的时候, 也可以得到通知。
如果是订阅所有的配置,那么就是 turn/realm/*/user/*/allocation/*/total_traffic
因为不能过期,所以redis 的配置文件,要配置这两个:
| 1 2 | timeout 0 tcp-keepalive 60 |
分析
假设我们已经在使用webrtc的应用上连接上turn server了,并且已经在转发了。那我们就可以看下这个redis跑的统计数据都是什么样的?
接下来先在redis 先sub一下:
| 1 2 3 4 5 6 7 8 9 10 11 12 13 14 15 16 17 18 19 20 21 22 23 24 25 26 27 28 29 30 31 32 33 34 35 36 37 38 39 40 41 42 43 44 45 46 47 48 49 50 51 52 53 54 55 56 57 58 59 60 61 62 63 64 65 66 67 68 69 70 | 127.0.0.1:6379[13]> psubscribe turn/realm/* Reading messages… (press Ctrl-C to quit) 1) “pmessage” 2) “turn/realm/*” 3) “turn/realm/pano/user/1532417691:26e4cd38fa6fc39fa8fc40fb25fe558c_21_24_18152649/allocation/001000000000003326/status” 4) “new lifetime=600” 1) “pmessage” 2) “turn/realm/*” 3) “turn/realm/pano/user/1532417569:26e4cd38fa6fc39fa8fc40fb25fe558c_21_24_18152649/allocation/001000000000003324/status” 4) “new lifetime=600” 1) “pmessage” 2) “turn/realm/*” 3) “turn/realm/pano/user/1532417569:26e4cd38fa6fc39fa8fc40fb25fe558c_21_24_18152649/allocation/003000000000003700/status” 4) “refreshed lifetime=0” 1) “pmessage” 2) “turn/realm/*” 3) “turn/realm/pano/user/1532417569:26e4cd38fa6fc39fa8fc40fb25fe558c_21_24_18152649/allocation/003000000000003700/status” 4) “deleted” 1) “pmessage” 2) “turn/realm/*” 3) “turn/realm/pano/user/1532417569:26e4cd38fa6fc39fa8fc40fb25fe558c_21_24_18152649/allocation/003000000000003700/total_traffic” 4) “rcvp=0, rcvb=0, sentp=0, sentb=0” 1) “pmessage” 2) “turn/realm/*” 3) “turn/realm/pano/user/1532417569:26e4cd38fa6fc39fa8fc40fb25fe558c_21_24_18152649/allocation/001000000000003324/traffic” 4) “rcvp=1610, rcvb=1607159, sentp=438, sentb=22052” 1) “pmessage” 2) “turn/realm/*” 3) “turn/realm/pano/user/1532417569:26e4cd38fa6fc39fa8fc40fb25fe558c_21_24_18152649/allocation/001000000000003324/traffic” 4) “rcvp=1385, rcvb=1404252, sentp=663, sentb=31187” 1) “pmessage” 2) “turn/realm/*” 3) “turn/realm/pano/user/1532417569:26e4cd38fa6fc39fa8fc40fb25fe558c_21_24_18152649/allocation/001000000000003324/traffic” 4) “rcvp=1407, rcvb=1442093, sentp=641, sentb=30066” 1) “pmessage” 2) “turn/realm/*” 3) “turn/realm/pano/user/1532417569:26e4cd38fa6fc39fa8fc40fb25fe558c_21_24_18152649/allocation/001000000000003324/traffic” 4) “rcvp=1383, rcvb=1408780, sentp=665, sentb=31146” 1) “pmessage” 2) “turn/realm/*” 3) “turn/realm/pano/user/1532417691:26e4cd38fa6fc39fa8fc40fb25fe558c_21_24_18152649/allocation/001000000000003326/status” 4) “refreshed lifetime=0” 1) “pmessage” 2) “turn/realm/*” 3) “turn/realm/pano/user/1532417691:26e4cd38fa6fc39fa8fc40fb25fe558c_21_24_18152649/allocation/001000000000003326/status” 4) “deleted” 1) “pmessage” 2) “turn/realm/*” 3) “turn/realm/pano/user/1532417691:26e4cd38fa6fc39fa8fc40fb25fe558c_21_24_18152649/allocation/001000000000003326/total_traffic” 4) “rcvp=0, rcvb=0, sentp=0, sentb=0” 1) “pmessage” 2) “turn/realm/*” 3) “turn/realm/pano/user/1532417569:26e4cd38fa6fc39fa8fc40fb25fe558c_21_24_18152649/allocation/001000000000003324/status” 4) “refreshed lifetime=0” 1) “pmessage” 2) “turn/realm/*” 3) “turn/realm/pano/user/1532417691:26e4cd38fa6fc39fa8fc40fb25fe558c_21_24_18152649/allocation/001000000000003327/status” 4) “new lifetime=600” 1) “pmessage” 2) “turn/realm/*” 3) “turn/realm/pano/user/1532417691:26e4cd38fa6fc39fa8fc40fb25fe558c_21_24_18152649/allocation/003000000000003705/status” 4) “new lifetime=600” 1) “pmessage” 2) “turn/realm/*” 3) “turn/realm/pano/user/1532417569:26e4cd38fa6fc39fa8fc40fb25fe558c_21_24_18152649/allocation/001000000000003324/status” 4) “deleted” 1) “pmessage” 2) “turn/realm/*” 3) “turn/realm/pano/user/1532417569:26e4cd38fa6fc39fa8fc40fb25fe558c_21_24_18152649/allocation/001000000000003324/total_traffic” 4) “rcvp=5785, rcvb=5862284, sentp=2407, sentb=114451” |
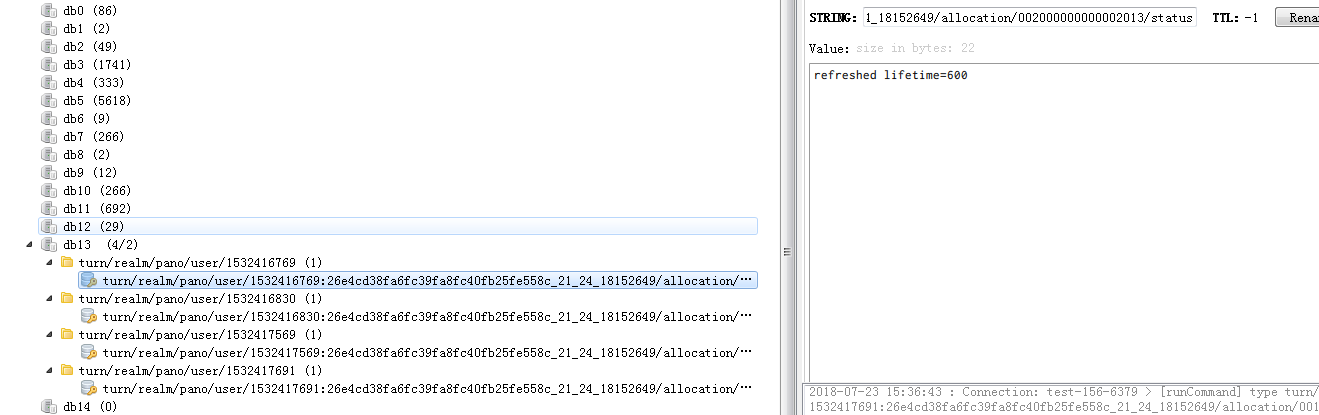
可以看到进行一次连接的话,会分配好几条临时会话。 从下图来看的话,可以看到有 4 条,其实这四条都属于同一个连接。
接下来我们一条一条来分析:
- 刚开始建立了一条 3326 的临时channel , 生命周期是 600s,也就是 10分钟
- 然后又建立了一条 3324 的临时channel
- 接下来的三条分别是,刷新一条 3700 的临时channel ,lifetime 为0,说明是要删除,所以接下来就收到一条 delete 的状态,说明这个临时topic要删除,然后当删除的时候,就会将这一段时间的流量(total_traffic )也传上来。
- 接下来的4条,全部都是 3324 这一个topic的流量信息。包括收到的字节和发送的字节
- 接下来的三条是3326,分别是将lifetime 为0,然后delete,最后关于这条临时channel 的流量过来。
- 接下来的一条是 3324 这一条的lifetime 为 0, 然后是两条新的临时channel 的建立, 然后就是 3324 收到 delete 的状态,和总流量的通知。
总结一下:
1. 一次的webrtc 的turnserver 转发,其实会分配了好几个临时的 channel。
2. 每个 channel 的生命周期和对应的状态
每个 channel 刚开始创建的时候,生命周期只有 600s, 这个可以在 配置文件设置:
| 1 2 3 4 5 | # Uncomment to set the lifetime for the channel. # Default value is 600 secs (10 minutes). # This value MUST not be changed for production purposes. # #channel-lifetime=600 |
而且刚开始创建就会有状态通知,内容就是 new lifetime=600。
虽然每个channel的生命周期都是 600s, 但是并不意味着,600s 之后,这个channel就会被删除,其实不是的,这个是可以被续的,也就是如果这个 channel 被续了,那么就会有这个状态通知:
| 1 2 3 4 | 1) “pmessage” 2) “turn/realm/*” 3) “turn/realm/pano/user/1532403222:26e4cd38fa6fc39fa8fc40fb25fe558c_21_24_18152649/allocation/004000000000003897/status” 4) “refreshed lifetime=600” |
这个说明被续了一个周期了。当然也有不续的,这时候也会有这个状态,不过这时候 lifetime 是 0:
| 1 2 3 4 | 1) “pmessage” 2) “turn/realm/*” 3) “turn/realm/pano/user/1532415366:07a9939e437c9bca97f67b4b74de6a2f_21_24_22819787/allocation/004000000000003905/status” 4) “refreshed lifetime=0” |
一旦 lifetime 为0, 就说明这个channel要被删除了。 这时候就会收到 delete 状态:
| 1 2 3 4 | 1) “pmessage” 2) “turn/realm/*” 3) “turn/realm/pano/user/1532415366:07a9939e437c9bca97f67b4b74de6a2f_21_24_22819787/allocation/000000000000001816/status” 4) “deleted” |
这时候就说明这条channel已经被删除了。
而且每一个channel 的最长生命周期是可以配置的,默认是 3600s:
| 1 2 3 4 5 | # Uncomment if you want to set the maximum allocation # time before it has to be refreshed. # Default is 3600s. # #max-allocate-lifetime=3600 |
所以一个完整的 channel 周期就是 创建-> 续周期(一次以上) -> 删除 (如果续的是 0)
针对这个,我后面试了一下, 在一次长达 一个多小时的webrtc连接, 那个转发流量的channel, 续周期续了7次, 一次 600s, 总的是 7 * 600 = 4200, 比3600 还大了,但是也还没有断开,所以这个也有点奇怪???
3. 流量信息
每一条channel 在生命周期之内,如果有进行流量转发的话,那么就会每隔一段时间就会有 traffic 这个状态过来,注意,如果是 stun 或者 local 这种不走转发的,那么是没有这个事件的:
| 1 2 3 4 | 1) “pmessage” 2) “turn/realm/*” 3) “turn/realm/pano/user/1532417569:26e4cd38fa6fc39fa8fc40fb25fe558c_21_24_18152649/allocation/001000000000003324/traffic” 4) “rcvp=1383, rcvb=1408780, sentp=665, sentb=31146” |
而且每次的channel 的生命周期结束之后,也就是 delete 状态,也会收到这一条生命周期的所有的转发流量数据。
| 1 2 3 4 | 1) “pmessage” 2) “turn/realm/*” 3) “turn/realm/pano/user/1532417569:26e4cd38fa6fc39fa8fc40fb25fe558c_21_24_18152649/allocation/001000000000003324/total_traffic” 4) “rcvp=5785, rcvb=5862284, sentp=2407, sentb=114451” |
跟 traffic 不一样, traffic 是真的是转发有流量,才会每隔一段时间抛一次,而 total_traffic 是必会有的,不管是穿透还是转发, 只不过如果是穿透的话,那就是都是 0,比如:
| 1 2 3 4 | 1) “pmessage” 2) “turn/realm/*” 3) “turn/realm/pano/user/1532415366:07a9939e437c9bca97f67b4b74de6a2f_21_24_22819787/allocation/004000000000003905/total_traffic” 4) “rcvp=0, rcvb=0, sentp=0, sentb=0” |
每一个 delete 状态,都会跟着一个 total_traffic 事件。 而里面的 这些参数,其实都是 traffic 的所有对应参数的总和。
这四个参数分别是:
| 1 2 3 4 | rcvp: 收到的数据包 rcvb: 收到的字节(byte) sentp: 发送的数据包 sentb: 发送的字节(byte) |
所以我们如果要统计这一次转发的时长的话,那么就要记录这次连接的所有的channel。也就是如果这一次的转发,有5个channel,那么就第一个channel创建的时候,就是开始时间, 当所有的channel 都断开的时候,那么就是结束时间。 一定要所有的channel 都断开,才算转发结束,
而且中间还会有不断的新的channel被创建,这些新的channel也要加入到map里面去。然后每一个channel断开,就从map里面去掉, 一直到最后map为空的话,才算转发结束。算转发的总流量也是一样,每一个channel都会有一段流量。 当所有的channel都断开的时候,加起来就是总的转发流量。
代码实现
刚开始是这样子写的:
| 1 2 3 4 5 6 7 8 9 10 11 12 13 14 15 16 17 18 19 20 21 22 23 24 25 26 27 28 29 30 31 32 33 34 35 36 37 38 39 40 41 42 43 44 45 46 47 48 49 50 51 52 53 54 55 56 57 58 59 60 61 62 63 64 65 66 67 68 69 70 71 72 73 74 75 76 77 78 79 80 81 82 83 84 85 86 87 88 89 90 91 92 93 94 95 96 97 98 99 100 101 102 103 104 105 106 107 108 109 110 111 112 113 114 115 116 117 118 119 120 121 122 123 124 125 126 127 128 129 130 131 132 133 134 135 136 137 138 139 140 141 142 143 144 145 146 147 148 149 150 151 152 153 154 155 156 157 158 159 160 161 162 163 164 165 166 167 168 169 170 171 172 173 174 175 176 177 178 179 180 181 182 183 184 185 186 187 188 189 190 191 192 193 194 195 196 197 198 199 200 201 202 203 204 205 206 207 208 209 210 211 212 213 214 215 216 217 218 219 220 221 222 223 224 225 226 227 228 229 230 231 232 233 234 235 236 237 238 | package main import ( “errors” “fmt” “github.com/garyburd/redigo/redis“ “iGong/util/log” “strconv” “strings” “sync” “time” ) type OnlineTimeBucket struct { Data map[string]*OnlineTimeBucketSub Locker *sync.Mutex } func NewOnlineTimeBucket() *OnlineTimeBucket { return &OnlineTimeBucket{ Data: make(map[string]*OnlineTimeBucketSub), Locker: &sync.Mutex{}, } } type OnlineTimeBucketSub struct { Timer map[string]*OnlineTime } type OnlineTime struct { Start int64 End int64 Delete bool TotalTraffIc bool Rcvp int Rcvb int Sentp int Sentb int } var onlineTimeBucket *OnlineTimeBucket var serverTime = time.Now().Unix() /* turn/realm/pano/user/1531882310:7ed1019263ce5e09f3d40a1ca15ae992_21_24_18152992/allocation/000000000000000495/status new lifetime=600 turn/realm/pano/user/1531881513:7ed1019263ce5e09f3d40a1ca15ae992_21_24_18152992/allocation/001000000000000462/status refreshed lifetime=0 turn/realm/pano/user/1531882310:7ed1019263ce5e09f3d40a1ca15ae992_21_24_18152992/allocation/004000000000000899/status deleted turn/realm/pano/user/1531881513:7ed1019263ce5e09f3d40a1ca15ae992_21_24_18152992/allocation/001000000000000462/total_traffic rcvp=18612, rcvb=894124, sentp=104268, sentb=114206669 turn/realm/pano/user/1531881926:26e4cd38fa6fc39fa8fc40fb25fe558c_21_24_18152649/allocation/004000000000000896/traffic rcvp=1847, rcvb=2052114, sentp=201, sentb=10652 */ func TurnServerStats() { conn, err := RedisTurn.GetConn() sub := redis.PubSubConn{Conn: conn} if err != nil { log.Error(err) } defer conn.Close() onlineTimeBucket = NewOnlineTimeBucket() sub.PSubscribe(“turn/realm/*”) for { switch n := sub.Receive().(type) { //case redis.Message: // fmt.Printf(“Message: %s %s\n”, n.Channel, n.Data) case redis.PMessage: err = forwardStats(n) if err != nil { continue } case error: fmt.Printf(“error: %v\n”, n) return } } } func forwardStats(data redis.PMessage) (err error) { fmt.Printf(“PMessage: %s %s %s\n”, data.Pattern, data.Channel, data.Data) event, deviceId, channel, err := decodeChannel(data.Channel) if err != nil { log.Error(err) return err } log.Info(event, deviceId) switch event { case “status”: //统计时长 和在线状态 onlineStatus := decodeDataWithStatus(data.Data) log.Info(onlineStatus) addOnlineTime(deviceId, channel, onlineStatus) case “total_traffic”: //统计流量 这个事件过来说明转发已经结束 并且只有一个会话是有值的 trafficMap, err := decodeDataWithTraffic(data.Data) if err != nil { return err } //rcvp 接收到的包数量 rcvb 接收到的流量 sentp 发送的包数量 sentb 发送的包流量 log.Info(trafficMap) addFlow(deviceId, channel, trafficMap) } return } func decodeChannel(channel string) (event string, deviceId, channelId string, err error) { args := strings.Split(channel, “/”) if len(args) != 8 { err = errors.New(“channel fail .”) return } event = args[7] deviceId = strings.Split(args[4], “:”)[1] channelId = args[6] return } func decodeDataWithStatus(data []byte) (onlineStatus int) { args := strings.Split(string(data), “=”) switch args[0] { //新建 case “new lifetime”: onlineStatus = 0 //刷新 case “refreshed lifetime”: onlineStatus = 1 //移除 case “deleted”: onlineStatus = 2 default: onlineStatus = 1 } return } func decodeDataWithTraffic(data []byte) (stats map[string]int, err error) { args := strings.Split(string(data), “,”) if len(args) != 4 { err = errors.New(“traffic data fail”) return } stats = make(map[string]int) for _, v := range args { statsInfo := strings.Split(v, “=”) s, _ := strconv.Atoi(statsInfo[1]) stats[strings.TrimLeft(statsInfo[0], ” “)] = s } return } //记录转发时长 func addOnlineTime(deviceId, channelId string, onlineStatus int) { if onlineStatus == 1 { return } onlineTimeBucket.Locker.Lock() timer := time.Now().Unix() if _, ok := onlineTimeBucket.Data[deviceId]; !ok { j := new(OnlineTimeBucketSub) j.Timer = make(map[string]*OnlineTime) onlineTimeBucket.Data[deviceId] = j } switch onlineStatus { case 0: log.Info(“new life_time”) var onlineModel = new(OnlineTime) onlineModel.Start = timer onlineTimeBucket.Data[deviceId].Timer[channelId] = onlineModel case 2: log.Info(“delete life_time”) if _, ok := onlineTimeBucket.Data[deviceId].Timer[channelId]; !ok { var onlineModel = new(OnlineTime) onlineModel.Start = serverTime onlineTimeBucket.Data[deviceId].Timer[channelId] = onlineModel } onlineTimeBucket.Data[deviceId].Timer[channelId].End = timer onlineTimeBucket.Data[deviceId].Timer[channelId].Delete = true } onlineTimeBucket.Locker.Unlock() } //记录转发流量并入库 func addFlow(deviceId, channelId string, trafficMap map[string]int) { onlineTimeBucket.Locker.Lock() if _, ok := onlineTimeBucket.Data[deviceId]; !ok { j := new(OnlineTimeBucketSub) j.Timer = make(map[string]*OnlineTime) onlineTimeBucket.Data[deviceId] = j } onlineTimeBucket.Data[deviceId].Timer[channelId].Rcvb = trafficMap[“rcvb”] onlineTimeBucket.Data[deviceId].Timer[channelId].Rcvp = trafficMap[“rcvp”] onlineTimeBucket.Data[deviceId].Timer[channelId].Sentb = trafficMap[“sentb”] onlineTimeBucket.Data[deviceId].Timer[channelId].Sentp = trafficMap[“sentp”] onlineTimeBucket.Data[deviceId].Timer[channelId].TotalTraffIc = true var isDelete = true for _, v := range onlineTimeBucket.Data[deviceId].Timer { if v.Delete == false || v.TotalTraffIc == false { isDelete = false } } if isDelete { //计算时间,,流量 var rcvb, rcvp, sentb, sentp int var end int64 start := time.Now().Unix() for _, v := range onlineTimeBucket.Data[deviceId].Timer { rcvb += v.Rcvb rcvp += v.Rcvp sentp += v.Sentp sentb += v.Sentb if start > v.Start { start = v.Start } if end < v.End { end = v.End } } accountInfo := strings.Split(deviceId, “_”) if len(accountInfo) < 4 { log.Info(“deviceId len fail “, deviceId) } total_time := onlineTimeBucket.Data[deviceId].Timer[channelId].End – onlineTimeBucket.Data[deviceId].Timer[channelId].Start err := InsertTurnServerLogs(accountInfo[3], accountInfo[0], accountInfo[1], accountInfo[2], start, end, total_time, rcvp, rcvb, sentp, sentb) if err != nil { log.Error(err) } onlineTimeBucket.Data[deviceId].Timer = nil delete(onlineTimeBucket.Data, deviceId) } onlineTimeBucket.Locker.Unlock() } |
按照上面的算法来做的话,当我在用web测试的时候,会出现一个情况:
就是如果 coturn 的连接断开了。但是对于这个username, 他还是会保持一两条临时 channel
| 1 2 3 4 5 6 7 8 9 10 11 12 13 14 15 16 17 18 19 20 21 22 23 24 25 26 27 28 29 30 31 32 33 34 35 36 | 1) “pmessage” 2) “turn/realm/*” 3) “turn/realm/pano/user/1532433896:26e4cd38fa6fc39fa8fc40fb25fe558c_21_24_18152649/allocation/000000000000001857/traffic” 4) “rcvp=1466, rcvb=1325047, sentp=582, sentb=29696” 1) “pmessage” 2) “turn/realm/*” 3) “turn/realm/pano/user/1532433896:26e4cd38fa6fc39fa8fc40fb25fe558c_21_24_18152649/allocation/001000000000003357/status” 4) “refreshed lifetime=0” 1) “pmessage” 2) “turn/realm/*” 3) “turn/realm/pano/user/1532433896:26e4cd38fa6fc39fa8fc40fb25fe558c_21_24_18152649/allocation/001000000000003357/status” 4) “deleted” 1) “pmessage” 2) “turn/realm/*” 3) “turn/realm/pano/user/1532433896:26e4cd38fa6fc39fa8fc40fb25fe558c_21_24_18152649/allocation/001000000000003357/total_traffic” 4) “rcvp=0, rcvb=0, sentp=0, sentb=0” 1) “pmessage” 2) “turn/realm/*” 3) “turn/realm/pano/user/1532433896:26e4cd38fa6fc39fa8fc40fb25fe558c_21_24_18152649/allocation/000000000000001857/status” 4) “refreshed lifetime=0” 1) “pmessage” 2) “turn/realm/*” 3) “turn/realm/pano/user/1532433896:26e4cd38fa6fc39fa8fc40fb25fe558c_21_24_18152649/allocation/003000000000003734/status” 4) “new lifetime=600” 1) “pmessage” 2) “turn/realm/*” 3) “turn/realm/pano/user/1532433896:26e4cd38fa6fc39fa8fc40fb25fe558c_21_24_18152649/allocation/001000000000003358/status” 4) “new lifetime=600” 1) “pmessage” 2) “turn/realm/*” 3) “turn/realm/pano/user/1532433896:26e4cd38fa6fc39fa8fc40fb25fe558c_21_24_18152649/allocation/000000000000001857/status” 4) “deleted” 1) “pmessage” 2) “turn/realm/*” 3) “turn/realm/pano/user/1532433896:26e4cd38fa6fc39fa8fc40fb25fe558c_21_24_18152649/allocation/000000000000001857/total_traffic” 4) “rcvp=1466, rcvb=1325047, sentp=582, sentb=29696” |

明明我连接断开了,但是又重新连接了两条。而且这两条根本不会释放
这个就会导致 isDelete 的条件没法成立,因为总有新的链接没有释放。
而且后面还发现,一次转发,虽然有好几条channel存在,但是真正转发流量的channel只有一条,而且过了一个多小时,还是没有断。所以原则上我们只要去判断这一条channel,就可以知道本次转发的时长和流量了。 其他的channel都不要管。但是如果是stun这种穿透的,因为没有转发流量,所以根本不知道那一条的channel,才是起作用的那一条????
后面发现这种情况其实是一个bug, 之所以浏览器刷新还保持两条turn channel 是因为浏览器在刷新的时候,其实没有明确的给手机端发送断开webrtc的信号。导致手机端其实还不知道webrtc断开了。所以手机端其实是对turnserver连接进行重连了, 这也是为啥会有新的两条channel 的问题。
我试了其他端,比如 ios 端,如果是断开的话,是不会有遗留turnserver 的channel 的,最后全部都会被清掉。因此对于web端,在刷新浏览器,或者是退出页面的时候,都要给手机的发送断开webrtc的信号,并且断开本地的webrtc连接。
所以web端的代码得改下:
| 1 2 3 4 5 6 7 8 9 10 11 12 13 14 15 16 17 18 19 20 21 22 | // 关掉 webrtc stopWebRtcServer: function () { var self = this; // 给手机端发送一个webrtc 关闭的指令 self.mqttSocket.pub( self.subCommonStr + ‘toTarget’, { “method”: “webrtc.stop”, }, { useAes: true, } ).done(function (data) { console.log(“%c accept stop:” + JSON.stringify(data), “color:red”); }); // 清空状态统计的定时 clearTimeout(self.rtcStateMap.timeId); // 关闭signal长连接 self.mqttSocket.close(); // 关闭webrtc 连接 self.rtcSocket.close(); }, |
其中 rtcSocket 的 close 事件为:
| 1 2 3 4 5 6 7 | close: function(){ // 停止 video 传输 var video = this._pc.getRemoteStreams()[0].getVideoTracks()[0]; video.stop(); // 关掉 pc 对象 this._pc.close(); } |
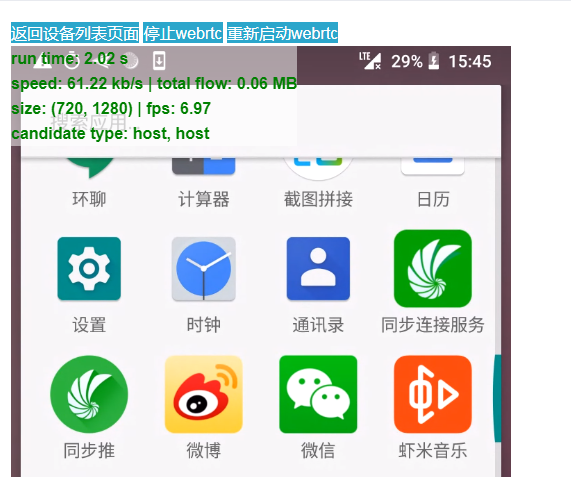
先停止video传输,再释放掉 pc 对象。这时候本来 webrtc work 的时候,是这样的:
看到的消息就是:
| 1 2 3 4 5 6 7 8 9 10 11 12 13 14 15 16 17 18 19 20 21 22 23 24 25 26 27 28 | 1) “pmessage” 2) “turn/realm/*” 3) “turn/realm/pano/user/1532677507:ac5fa606abf5ae9d02bd4206625b4911_21_24_18152992/allocation/001000000000004071/status” 4) “new lifetime=600” 1) “pmessage” 2) “turn/realm/*” 3) “turn/realm/pano/user/1532677507:ac5fa606abf5ae9d02bd4206625b4911_21_24_18152992/allocation/004000000000004390/status” 4) “new lifetime=600” 1) “pmessage” 2) “turn/realm/*” 3) “turn/realm/pano/user/1532677507:ac5fa606abf5ae9d02bd4206625b4911_21_24_18152992/allocation/000000000000002210/status” 4) “new lifetime=600” 1) “pmessage” 2) “turn/realm/*” 3) “turn/realm/pano/user/1532677507:ac5fa606abf5ae9d02bd4206625b4911_21_24_18152992/allocation/004000000000004390/status” 4) “refreshed lifetime=0” 1) “pmessage” 2) “turn/realm/*” 3) “turn/realm/pano/user/1532677507:ac5fa606abf5ae9d02bd4206625b4911_21_24_18152992/allocation/004000000000004390/status” 4) “deleted” 1) “pmessage” 2) “turn/realm/*” 3) “turn/realm/pano/user/1532677507:ac5fa606abf5ae9d02bd4206625b4911_21_24_18152992/allocation/004000000000004390/total_traffic” 4) “rcvp=0, rcvb=0, sentp=0, sentb=0” 1) “pmessage” 2) “turn/realm/*” 3) “turn/realm/pano/user/1532677507:ac5fa606abf5ae9d02bd4206625b4911_21_24_18152992/allocation/001000000000004071/traffic” 4) “rcvp=1546, rcvb=1442311, sentp=502, sentb=24802” |

就是建了3条 channel ,然后删掉一条 390 ,保留两条, 后面分别是 210 和 071
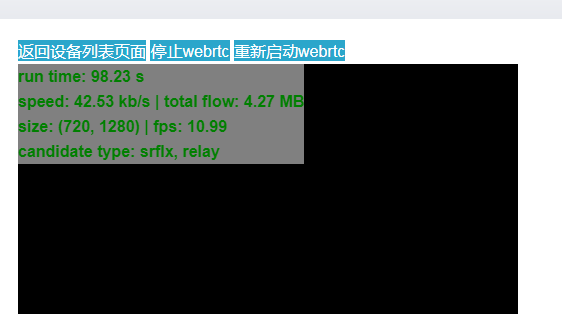
这时候我点击 停止webrtc 按钮,图片传输就会停止了。这时候webrtc 就断开了。
这时候就收到了断开的消息了, 210 和 071 都断开了:
| 1 2 3 4 5 6 7 8 9 10 11 12 13 14 15 16 17 18 19 20 21 22 23 24 | 1) “pmessage” 2) “turn/realm/*” 3) “turn/realm/pano/user/1532677507:ac5fa606abf5ae9d02bd4206625b4911_21_24_18152992/allocation/000000000000002210/status” 4) “refreshed lifetime=0” 1) “pmessage” 2) “turn/realm/*” 3) “turn/realm/pano/user/1532677507:ac5fa606abf5ae9d02bd4206625b4911_21_24_18152992/allocation/001000000000004071/status” 4) “refreshed lifetime=0” 1) “pmessage” 2) “turn/realm/*” 3) “turn/realm/pano/user/1532677507:ac5fa606abf5ae9d02bd4206625b4911_21_24_18152992/allocation/000000000000002210/status” 4) “deleted” 1) “pmessage” 2) “turn/realm/*” 3) “turn/realm/pano/user/1532677507:ac5fa606abf5ae9d02bd4206625b4911_21_24_18152992/allocation/000000000000002210/total_traffic” 4) “rcvp=0, rcvb=0, sentp=0, sentb=0” 1) “pmessage” 2) “turn/realm/*” 3) “turn/realm/pano/user/1532677507:ac5fa606abf5ae9d02bd4206625b4911_21_24_18152992/allocation/001000000000004071/status” 4) “deleted” 1) “pmessage” 2) “turn/realm/*” 3) “turn/realm/pano/user/1532677507:ac5fa606abf5ae9d02bd4206625b4911_21_24_18152992/allocation/001000000000004071/total_traffic” 4) “rcvp=4595, rcvb=4367095, sentp=1549, sentb=74756” |

这时候channel 就全部为空了。
所以要这样才可以。 但是问题来了,刚才是我们手动点击 停止 webrtc 按钮的,当然流程是对的。
但是如果是直接刷新浏览器呢,那可是来不及处理的????
事实上也是有这个问题,如果直接刷新浏览器,并且不作处理的时候,就会出现最早之前的那种情况,就是手机端认为还连着,所以 turnserver 又建了两条新的 channel 。
所以我后面加了这个事件 onbeforeunload:
| 1 2 3 4 5 6 | // 这时候要设置一个unload事件,不然如果直接浏览器刷新的话,手机端是不知道webrtc不用了,他还会连接 turnserver, 导致turnserver 的session 一直在,后面没法算时间 // 设置unonload, 防止直接刷新浏览器的时候,没有传 webrtc.stop 指令 window.onbeforeunload = function(){ self.stopWebRtcServer(); return true; }; |
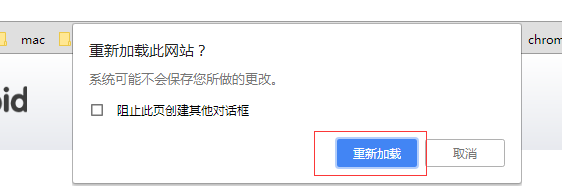
每次用户刷新的时候,这时候就会弹出这个窗口,当用户点击 重新加载的时候, 这时候 stop 操作就已经处理完了。
因此就成功关闭了,缺点就是用户每次刷新都会弹窗,并且要点击重新加载。
所以服务端来说的话,整个连接过程中创建的channel 都要做判断,只有当channel 全部断掉的时候, 才判断这个连接结束,这时候才要算时间。虽然每一次连接都有一条channel 在发送流量。所以如果 traffic 有值的话,那么就是这一条有流量统计。所以如果有收到有流量的 total_traffic 的事件 ,那么应该就是 relay 的连接断开了。这时候就可以计算时长并入库了。
所以修改后的代码如下:
| 1 2 3 4 5 6 7 8 9 10 11 12 13 14 15 16 17 18 19 20 21 22 23 24 25 26 27 28 29 30 31 32 33 34 35 36 37 38 39 40 41 42 43 44 45 46 47 48 49 50 51 52 53 54 55 56 57 58 59 60 61 62 63 64 65 66 67 68 69 70 71 72 73 74 75 76 77 78 79 80 81 82 83 84 85 86 87 88 89 90 91 92 93 94 95 96 97 98 99 100 101 102 103 104 105 106 107 108 109 110 111 112 113 114 115 116 117 118 119 120 121 122 123 124 125 126 127 128 129 130 131 132 133 134 135 136 137 138 139 140 141 142 143 144 145 146 147 148 149 150 151 152 153 154 155 156 157 158 159 160 161 162 163 164 165 166 167 168 169 170 171 172 173 174 175 176 177 178 179 180 181 182 183 184 185 186 187 188 189 190 191 192 193 194 195 196 197 198 199 200 201 202 203 204 205 206 207 208 209 210 211 212 213 214 215 216 217 218 219 220 221 222 223 224 225 226 227 228 229 230 231 232 233 234 235 236 237 238 239 240 241 242 243 244 245 246 247 248 249 250 251 252 253 254 255 256 257 258 259 260 261 262 263 264 265 266 267 268 269 270 271 272 273 274 275 276 277 278 279 280 281 282 283 284 285 286 287 288 289 | package main import ( “errors” “fmt” “github.com/garyburd/redigo/redis“ “iGong/util/log” “strconv” “strings” “sync” “time” ) type OnlineTimeBucket struct { Data map[string]*OnlineTimeBucketSub Locker *sync.RWMutex } func NewOnlineTimeBucket() *OnlineTimeBucket { return &OnlineTimeBucket{ Data: make(map[string]*OnlineTimeBucketSub), Locker: &sync.RWMutex{}, } } type OnlineTimeBucketSub struct { Timer map[string]*OnlineTime } //map 存在线时间,结束时间-开始时间,,结束之后再存入表 type OnlineTime struct { Start int64 RefreshedFlow int64 End int64 Delete bool TotalTraffIc bool Rcvp int Rcvb int Sentp int Sentb int } var onlineTimeBucket *OnlineTimeBucket var serverTime = time.Now().Unix() /* turn/realm/pano/user/1531882310:7ed1019263ce5e09f3d40a1ca15ae992_21_24_18152992/allocation/000000000000000495/status new lifetime=600 turn/realm/pano/user/1531881513:7ed1019263ce5e09f3d40a1ca15ae992_21_24_18152992/allocation/001000000000000462/status refreshed lifetime=0 turn/realm/pano/user/1531882310:7ed1019263ce5e09f3d40a1ca15ae992_21_24_18152992/allocation/004000000000000899/status deleted turn/realm/pano/user/1531881513:7ed1019263ce5e09f3d40a1ca15ae992_21_24_18152992/allocation/001000000000000462/total_traffic rcvp=18612, rcvb=894124, sentp=104268, sentb=114206669 turn/realm/pano/user/1531881926:26e4cd38fa6fc39fa8fc40fb25fe558c_21_24_18152649/allocation/004000000000000896/traffic rcvp=1847, rcvb=2052114, sentp=201, sentb=10652 */ func TurnServerStats() { conn, err := RedisTurn.GetConn() sub := redis.PubSubConn{Conn: conn} if err != nil { log.Error(err) } defer conn.Close() onlineTimeBucket = NewOnlineTimeBucket() sub.PSubscribe(“turn/realm/*”) for { switch n := sub.Receive().(type) { //case redis.Message: // fmt.Printf(“Message: %s %s\n”, n.Channel, n.Data) case redis.PMessage: err = forwardStats(n) if err != nil { continue } case error: fmt.Printf(“error: %v\n”, n) return } } } func forwardStats(data redis.PMessage) (err error) { fmt.Printf(“PMessage: %s %s %s\n”, data.Pattern, data.Channel, data.Data) event, deviceId, channel, err := decodeChannel(data.Channel) if err != nil { log.Error(err) return err } log.Info(event, deviceId) switch event { case “status”: //统计时长 和在线状态 onlineStatus := decodeDataWithStatus(data.Data) log.Info(onlineStatus) addOnlineTime(deviceId, channel, onlineStatus) case “traffic”, “total_traffic”: //统计流量 这个事件过来说明转发已经结束 并且只有一个会话是有值的 trafficMap, err := decodeDataWithTraffic(data.Data) if err != nil { return err } //rcvp 接收到的包数量 rcvb 接收到的流量 sentp 发送的包数量 sentb 发送的包流量 log.Info(trafficMap) addFlow(deviceId, channel, trafficMap, event) } return } func decodeChannel(channel string) (event string, deviceId, channelId string, err error) { args := strings.Split(channel, “/”) if len(args) != 8 { err = errors.New(“channel fail .”) return } event = args[7] deviceId = strings.Split(args[4], “:”)[1] channelId = args[6] return } func decodeDataWithStatus(data []byte) (onlineStatus int) { args := strings.Split(string(data), “=”) switch args[0] { //新建 case “new lifetime”: onlineStatus = 0 //刷新 case “refreshed lifetime”: onlineStatus = 1 //移除 case “deleted”: onlineStatus = 2 default: onlineStatus = 1 } return } func decodeDataWithTraffic(data []byte) (stats map[string]int, err error) { args := strings.Split(string(data), “,”) if len(args) != 4 { err = errors.New(“traffic data fail”) return } stats = make(map[string]int) for _, v := range args { statsInfo := strings.Split(v, “=”) s, _ := strconv.Atoi(statsInfo[1]) stats[strings.TrimLeft(statsInfo[0], ” “)] = s } return } //记录转发时长 func addOnlineTime(deviceId, channelId string, onlineStatus int) { if onlineStatus == 1 { return } timer := time.Now().Unix() if _, ok := onlineTimeBucket.Data[deviceId]; !ok { j := new(OnlineTimeBucketSub) j.Timer = make(map[string]*OnlineTime) onlineTimeBucket.Locker.Lock() onlineTimeBucket.Data[deviceId] = j onlineTimeBucket.Locker.Unlock() } onlineTimeBucket.Locker.RLock() switch onlineStatus { case 0: log.Info(“new life_time”) var onlineModel = new(OnlineTime) onlineModel.Start = timer onlineTimeBucket.Data[deviceId].Timer[channelId] = onlineModel case 2: log.Info(“delete life_time”) if _, ok := onlineTimeBucket.Data[deviceId].Timer[channelId]; !ok { var onlineModel = new(OnlineTime) onlineModel.Start = serverTime onlineTimeBucket.Data[deviceId].Timer[channelId] = onlineModel } onlineTimeBucket.Data[deviceId].Timer[channelId].End = timer onlineTimeBucket.Data[deviceId].Timer[channelId].Delete = true } onlineTimeBucket.Locker.RUnlock() } //记录转发流量并入库 func addFlow(deviceId, channelId string, trafficMap map[string]int, event string) { if _, ok := onlineTimeBucket.Data[deviceId]; !ok { j := new(OnlineTimeBucketSub) j.Timer = make(map[string]*OnlineTime) j.Timer[channelId].Start = time.Now().Unix() onlineTimeBucket.Locker.Lock() onlineTimeBucket.Data[deviceId] = j onlineTimeBucket.Locker.Unlock() } else { } onlineTimeBucket.Locker.RLock() if event == “total_traffic” { onlineTimeBucket.Data[deviceId].Timer[channelId].Rcvb = trafficMap[“rcvb”] onlineTimeBucket.Data[deviceId].Timer[channelId].Rcvp = trafficMap[“rcvp”] onlineTimeBucket.Data[deviceId].Timer[channelId].Sentb = trafficMap[“sentb”] onlineTimeBucket.Data[deviceId].Timer[channelId].Sentp = trafficMap[“sentp”] onlineTimeBucket.Data[deviceId].Timer[channelId].TotalTraffIc = true var isDelete = true if trafficMap[“rcvb”] == 0 { //当穿透的时候流量为0,并且不会保存回话,所以需要判断所有会话是否关闭 当转发的时候,流量会大于0 ,但是可能会保留回话,所以转发的时候只需要判断流量过来就可以结束 for _, v := range onlineTimeBucket.Data[deviceId].Timer { if v.Delete == false || v.TotalTraffIc == false { isDelete = false } } } if isDelete { onlineTimeBucket.Locker.RUnlock() insertFlowLogs(deviceId) return } } else { onlineTimeBucket.Data[deviceId].Timer[channelId].RefreshedFlow = time.Now().Unix() } onlineTimeBucket.Locker.RUnlock() } func insertFlowLogs(deviceId string) { log.Info(“start insertFlowLogs=>”,deviceId) var rcvb, rcvp, sentb, sentp int var end int64 start := time.Now().Unix() for _, v := range onlineTimeBucket.Data[deviceId].Timer { rcvb += v.Rcvb rcvp += v.Rcvp sentp += v.Sentp sentb += v.Sentb if start > v.Start { start = v.Start } if end < v.End { end = v.End } } accountInfo := strings.Split(deviceId, “_”) if len(accountInfo) < 4 { log.Info(“deviceId len fail “, deviceId) } err := InsertTurnServerLogs(accountInfo[3], accountInfo[0], accountInfo[1], accountInfo[2], start, end, end-start, rcvp, rcvb, sentp, sentb) if err != nil { log.Error(err) } onlineTimeBucket.Locker.Lock() onlineTimeBucket.Data[deviceId].Timer = nil delete(onlineTimeBucket.Data, deviceId) onlineTimeBucket.Locker.Unlock() } //程序关闭时调用,,记录 使用时长 func forceInsertTurnServerUseLogs() { onlineTimeBucket.Locker.Lock() log.Info(“start forceInsertTurnServerUseLogs”) for k, v := range onlineTimeBucket.Data { //取其中一个的开始时间就可以 var start = time.Now().Unix() var end = time.Now().Unix() var rcvb, rcvp, sentb, sentp int for _, v := range v.Timer { rcvb += v.Rcvb rcvp += v.Rcvp sentp += v.Sentp sentb += v.Sentb if start > v.Start { start = v.Start } } useTime := end – start accountInfo := strings.Split(k, “_”) if len(accountInfo) < 4 { log.Info(“deviceId len fail “, k) } err := InsertTurnServerLogs(accountInfo[3], accountInfo[0], accountInfo[1], accountInfo[2], start, end, useTime, rcvp, rcvb, sentp, sentb) if err != nil { log.Error(err) } } onlineTimeBucket.Locker.Unlock() } |
如果是穿透的话,因为没有流量,所以每次收到 total_traffic的时候,都要判断是不是所有的channel 都断开了。如果是的话,那么就是连接断开了。这时候就统计时长并且入统计。
- 本文作者: Zach Ke
- 本文链接: http://kebingzao.com/2018/11/15/turn-stat/
- 版权声明: 本博客所有文章除特别声明外,均采用 CC BY-NC-SA 3.0 许可协议。转载请注明出处!
Linux使用unzip命令解压其中的部分文件到指定文件夹
相信很多人都遇到过Candy的情况:
公司电商平台备份后文件大小多达10个G!海量小文件、图片、js、css等等……;
这造成了一种情况,如果不小心删除了一个文件而无法恢复的情况! 那就只能从备份文件中提取咯! 但是一想到为了提取几KB的一个文件,而unzip整个压缩文件。
请谨记以下命令:
unzip <Your zip file> “*mobile/要解压的文件” -d <要解压的目录>
如:unzip www.dnsdizhi.com.zip “Nginx/* ” Nginx/
* : 可以使用*做通配符,具体使用我就不废话了!
-d : -d 参数后面跟上你要解压文件到哪个目录;
ssh登录很慢解决方法
使用ssh客户端(如:putty)连接Linux服务器,可能会等待10-30秒才有提示输入密码。严重影响工作效率。登录很慢,登录上去后速度正常,这种情况主要有两种可能的原因:
1. DNS反向解析问题
OpenSSH在用户登录的时候会验证IP,它根据用户的IP使用反向DNS找到主机名,再使用DNS找到IP地址,最后匹配一下登录的IP是否合法。如果客户机的IP没有域名,或者DNS服务器很慢或不通,那么登录就会很花时间。
解决办法:在目标服务器上修改sshd服务器端配置,并重启sshd
- vi /etc/ssh/sshd_config
- UseDNS no
2. 关闭ssh的gssapi认证
用ssh -v user@server 可以看到登录时有如下信息:
- debug1: Next authentication method: gssapi-with-mic
- debug1: Unspecified GSS failure. Minor code may provide more information
注:ssh -vvv user@server 可以看到更细的debug信息
解决办法:
修改sshd服务器端配置
- vi /etc/ssh/ssh_config
- GSSAPIAuthentication no
可以使用ssh -o GSSAPIAuthentication=no user@server登录
GSSAPI ( Generic Security Services Application Programming Interface) 是一套类似Kerberos 5的通用网络安全系统接口。该接口是对各种不同的客户端服务器安全机制的封装,以消除安全接口的不同,降低编程难度。但该接口在目标机器无域名解析时会有问题
使用strace查看后发现,ssh在验证完key之后,进行authentication gssapi-with-mic,此时先去连接DNS服务器,在这之后会进行其他操作
OpenSSH_6.6.1, OpenSSL 1.0.1e-fips 11 Feb 2013
debug1: Reading configuration data /etc/ssh/ssh_config
debug1: /etc/ssh/ssh_config line 56: Applying options for *
debug1: Connecting to kr.worthcloud.cn [107.150.126.57] port 36000.
debug1: Connection established.
debug1: identity file /home/fredzeng/.ssh/id_rsa type -1
debug1: identity file /home/fredzeng/.ssh/id_rsa-cert type -1
debug1: identity file /home/fredzeng/.ssh/id_dsa type -1
debug1: identity file /home/fredzeng/.ssh/id_dsa-cert type -1
debug1: identity file /home/fredzeng/.ssh/id_ecdsa type -1
debug1: identity file /home/fredzeng/.ssh/id_ecdsa-cert type -1
debug1: identity file /home/fredzeng/.ssh/id_ed25519 type -1
debug1: identity file /home/fredzeng/.ssh/id_ed25519-cert type -1
debug1: Enabling compatibility mode for protocol 2.0
debug1: Local version string SSH-2.0-OpenSSH_6.6.1
debug1: Remote protocol version 2.0, remote software version OpenSSH_7.4
debug1: match: OpenSSH_7.4 pat OpenSSH* compat 0x04000000
debug1: SSH2_MSG_KEXINIT sent
debug1: SSH2_MSG_KEXINIT received
debug1: kex: server->client aes128-ctr hmac-sha1-etm@openssh.com none
debug1: kex: client->server aes128-ctr hmac-sha1-etm@openssh.com none
debug1: kex: curve25519-sha256@libssh.org need=20 dh_need=20
debug1: kex: curve25519-sha256@libssh.org need=20 dh_need=20
debug1: sending SSH2_MSG_KEX_ECDH_INIT
debug1: expecting SSH2_MSG_KEX_ECDH_REPLY
debug1: Server host key: ECDSA 66:cc:4d:4a:e0:88:3d:77:5f:a4:fd:5f:ff:05:5c:94
debug1: Host ‘[kr.worthcloud.cn]:36000’ is known and matches the ECDSA host key.
debug1: Found key in /home/fredzeng/.ssh/known_hosts:3
debug1: ssh_ecdsa_verify: signature correct
debug1: SSH2_MSG_NEWKEYS sent
debug1: expecting SSH2_MSG_NEWKEYS
debug1: SSH2_MSG_NEWKEYS received
debug1: Roaming not allowed by server
debug1: SSH2_MSG_SERVICE_REQUEST sent
debug1: SSH2_MSG_SERVICE_ACCEPT received
debug1: Authentications that can continue: publickey,password
debug1: Next authentication method: publickey
debug1: Trying private key: /home/fredzeng/.ssh/id_rsa
debug1: Trying private key: /home/fredzeng/.ssh/id_dsa
debug1: Trying private key: /home/fredzeng/.ssh/id_ecdsa
debug1: Trying private key: /home/fredzeng/.ssh/id_ed25519
debug1: Next authentication method: password
电信、连通要求限制电脑数量联网解决办法
原文且维护更新地址:在厦大宿舍安装路由器
前言
厦大一些宿舍要求用一个客户端联网,所以不能装路由器;17 年暑假我找到了获得真实的 PPPoE 用户名的方法,于是可以绕过绕过这个客户端联网,也可以安装路由器。除此以外,有时用客户端联网会出现一些奇怪的问题(我见过几例,网页打不开或者客户端报错什么的),也可以用这个办法,不用客户端联网直接拨号解决。下面会介绍这个方法。
2018 年七夕前后,学校开始检测时间戳和 UA 来判断一个账号是否共享给了多台设备使用(不论是安装路由器还是在电脑上开热点)。如果检测到就会禁止账号联网半个小时(认证日志显示“检测到代理”);随后我也找到了绕过检查的办法。下面也会介绍这个方法。
如果在阅读的过程中有问题,可以 QQ 联系(897331845)。如果是小白寻求帮助,请在联系我之前确认自己的网线没问题也插对了,确认自己的密码没有弄错,不要因为这些问题浪费大家的时间。如果是来交朋友的,那么非常欢迎。
为了避免被查水表,我还需要多说几句废话:
- 对于任何硬、软件的损坏,本人不赔偿,也不保证协助处理,哪怕这样的后果是因教程中的错误造成的;你需要自担风险。出现问题时,我应该会尽力协助,但我不是专业技术人员,没有能力也没有义务保证教程内容万无一失。尽管我还没有遇到过把路由器弄坏的例子,但读者也需要做好损失一台价值几十元或者几百元的路由器的心理准备。另外,本教程中的内容会使你的路由器失去保修。
- 对于因为安装路由器而可能造成的事故,我不负责。请设置足够复杂的管理员密码,并妥善保存;如果发生了安全事故(资金被盗、个人信息泄露等),与本人无关。
- 厦大宿舍明令禁止安装路由器,相关文件点击这里可以查看。我没有怂恿或建议任何同学安装路由器,安装路由器的行为完全是安装者的个人意志导致的,本人仅仅是作为技术交流的发起者而存在。请仅仅以学习研究为目的鼓捣路由器,并在安装好路由器之后 24 小时内再将之拆除;如果您喜欢上网,请按照学校指明的方式连接到互联网。如果学校根据校规等文件追究责任,与我无关。
- 不允许将此技术用于任何商业行为,我本人也保证不会用来赚钱,而会将研究结果无偿地公布出来,只为造福同学
的同时顺便装逼。 - 不要发表不文明的言论。虽然我也觉得学校这样做很不厚道,但说脏话还是不好的。鼓励积极地传播这篇文章,以及义务地帮助身边有需要的同学。
简单地安装路由器(绕过客户端联网)
非常简单:
-
确认自己在“厦门大学宽带认证客户端”(就是电脑联网时需要使用的那个软件)中填写的那个学号,以及选择的是电信还是移动。如果忘掉了,先把正确的试出来。
-
将学号按照下面的规则转换(实质上是 ASCII 码加四),在前面加上
{SRUN2},在后面加上@cmcc(移动)或@ctnet(电信),得到用户名。
| 转换前 | 0 | 1 | 2 | 3 | 4 | 5 | 6 | 7 | 8 | 9 |
|---|---|---|---|---|---|---|---|---|---|---|
| 转换后 | 4 | 5 | 6 | 7 | 8 | 9 | :(英文冒号) | ;(英文分号) | < | = |
例如,小明的学号为19720192203456,移动,则用户名为{SRUN2}5=;645=664789:@cmcc。
-
用户名对应的密码就是“厦门大学宽带认证客户端”中填写的密码。
-
如果目标是解决网络问题,在电脑创建 PPPoE 拨号(不会就去百度),把用户名密码填进去,直接拨号就可以了;如果目标是装路由器,将这个用户名和密码按正常的方法填入路由器,按通常方法设置就可以了。有的奇葩路由器用户名不能包含大括号,那就换一台。
我最先找到的办法是在系统日志里找用户名;后来经过别人提醒,才发现用户名有这样的规律。
配置防止共享检测
学校的共享检测并不十分严格,并不总是可以检测到装或者没装路由器;是否被查到看人品,有的人可能几天才会被查到一次。如果要装路由器,建议先不用配置防止共享检测,如果接下来总是被封掉的话,再来配置。
下面的内容中,我假设读者已经熟悉了通常情况下安装路由器的方法。你要是完完全全的小白,那这个不适合你,找你身边会的人或者我帮你做吧。
安装 OpenWrt
这一节的目标是:得到一台安装好 OpenWrt 的路由器。
“OpenWrt”(Linux 的一个发行版)是一个安装在路由器上的操作系统。OpenWrt 对路由器的性能要求较高,所以只有一部分中高端的路由器可以安装。淘宝或者咸鱼上可以很容易找到已经安装好 OpenWrt 的路由器售卖,最便宜大概五十块钱就可以买到;也可以自己买一台路由器,自己动手安装 OpenWrt。
OpenWrt 的官网是 openwrt.org,打开比较慢需要耐心等待。在这里直接搜索你的路由器的型号,一般来说就可以找到一个详细的页面,上面会详细地说明这个型号是否支持安装 OpenWrt 以及在哪里下载、怎样安装等。也可以直接百度或者谷歌,常常也可以找到详尽的中文教程。不同型号的路由器,安装方法不尽相同;任何版本的 OpenWrt 都是可以用来绕开检测的,并且安装方法没有区别;推荐安装官方最新稳定版。当然了,如果无论如何也找不到相关的资料,那说明这个路由器不能安装 OpenWrt。
路由器的型号(Model)在路由器背面就可以看到。有时,同一个型号中还会分几个不同的硬件版本。
有的路由器会注明“基于 OpenWrt 深度定制”,不要买,除非你有办法刷回原版 OpenWrt。有的路由器会注明安装了“明月永在”或其它非官方版本的 OpenWrt,也可以买,但因为无法拿到这个系统的 SDK,所以在接下来的步骤中要么受限制、要么还需要自己再刷回官方版本;具体情况后面会说明。
“LEDE”和 OpenWrt 几乎一样,可以当作 OpenWrt 来用。
在很多情况下,安装 OpenWrt 只需要在管理页面中使用“系统更新”或“固件升级”功能,就可以将 OpenWrt 安装好(使用文件名以factory.xxx结尾的那个文件,勾选“不保留配置”)。
安装好 OpenWrt 后,建议等系统完全启动后,马上再断电重启一遍。
由于这一步没有统一的方法,虽然比较麻烦,但无法更详细地写下去了。
配置上网
现在,你已经有了一台安装好 OpenWrt 的路由器。这一节的目标是,让你的 OpenWrt 可以上网,以及配置好无线。
方法和配置大多路由器差不多,只不过 OpenWrt 没有面向新手的一目了然的指引,而需要在繁多的设置中找出需要修改的那部分。
-
进入管理页面。如果是刚刷入的 OpenWrt 没有
root账户密码,登入后按照提醒设置一个即可;如果已经有了密码,也可以修改:点击 Go to password configuration 按钮或 System -> Administrator(管理权)。如果你不知道路由器的管理页面地址,可以接好路由器后打开命令提示符,输入
ipconfig并回车,寻找“默认网关”一项。新安装的 OpenWrt 管理页面地址一般是192.168.1.1。- Password(密码):填写你想好的管理员密码。
- Confirmation(确认密码):再填一遍。
点击 Save & Apply(保存并应用)。
-
点击 Network(网络)-> Interfaces(接口),点击“WAN”对应的 Edit 按钮。
- Protocol(通信协议):改选为
PPPoE,然后点击出现的 Switch Protocol(切换协议)按钮。 - PAP/CHAP username(PAP/CHAP 用户名):填入之前由学号转换得到的用户名。
- PAP/CHAP password(PAP/CHAP 密码):填入对应的密码。
点击 Save & Apply(保存并应用)。这时,路由器本身和有线网已经可以上网了。
- Protocol(通信协议):改选为
-
点击 Network -> Wireless(无线)。如果提示 Disabled(已禁用)就点击 Enable(启用)。可能只有一个 2.4G 的,也可能有一个 2.4G 的、一个 5G 的。点 2.4G 的“编辑”。
- ESSID:填 WiFi 的名字。
点击 Wireless Security(无线安全)。
- Encryption(加密):改选为
WPA2-PSK。 - Key(密码):填 WiFi 密码。
点击 Save & Apply(保存并应用)。
如果还有一个 5G 的,就一样地配置,只是 Channel(信道)需要选择
147或更高。这时,WiFi 就可以正常联网啦。
配置防检测
接下来的步骤必须联网才行,进行之前先确认已经可以使用路由器的网络打开百度。另外,如果你现在是在手机上看我的这篇文章,强烈建议你接下来改用电脑看,可以方便地复制粘贴一些代码;如果你非要手动打代码,注意不要打错,一个空格都不要错。
防检测分为两个部分:同步局域网内电脑的时间,以及修改 HTTP 头的 UA。
同步时间
NTP 就是用来同步两台电脑上的时钟的协议。接下来先启用 OpenWrt 自带的 NTP 服务器,然后将局域网内所有时钟校正的请求都发给路由器上的 NTP 服务器(也就是说,无视局域网内的电脑原本想要和哪台服务器同步时间,而强制将路由器上的时钟作为标准),这样局域网内所有的电脑上的时间都会变得一致。
只需要在管理页面中修改几个设置就可以了。
-
配置 NTP 服务。点击 System -> System。
- 勾选 Enable NTP client(启用 NTP 客户端)和 Provide NTP server(作为 NTP 服务器提供服务)。
- NTP server candidates(候选 NTP 服务器)四个框框分别填写
time.xmu.edu.cn、cn.pool.ntp.org、pool.ntp.org、time.apple.com。
点击 Save & Apply 按钮。
-
配置防火墙转发。点击 Network -> Firewall(防火墙),然后点击 Custom Rules 标签,在大框框里另起一行,添加下面的代码:
iptables -t nat -N ntp_force_local
iptables -t nat -I PREROUTING -p udp --dport 123 -j ntp_force_local
iptables -t nat -A ntp_force_local -d 0.0.0.0/8 -j RETURN
iptables -t nat -A ntp_force_local -d 127.0.0.0/8 -j RETURN
iptables -t nat -A ntp_force_local -d 192.168.0.0/16 -j RETURN
iptables -t nat -A ntp_force_local -s 192.168.0.0/16 -j DNAT --to-destination 192.168.1.1
第六行最后的
192.168.1.1需要修改为你的路由器的管理页面地址。例如,你的管理页面地址是192.168.10.1,那么这一行代码需要修改为:iptables -t nat -A ntp_force_local -s 192.168.0.0/16 -j DNAT --to-destination 192.168.10.1然后点击 Restart Firewall(重启防火墙)。
-
确认效果。在 Windows 电脑上,打开控制面板,在右上角查看方式处选择小图标,然后点击“日期和时间”。点击 Internet 时间 -> 更改设置,点几次“立即更新”,直到提示“时钟在 xxx 与 xxx 同步成功”。这时,暂时地拔掉墙上接口与路由器之间的网线(断开了外网的连接),再点一次“立即更新”,应该仍然提示成功。
修改 HTTP 头的 UA
UA 中包含了操作系统版本等信息,而 HTTP 协议没有对这些信息加密,因此别人可以从这里看到这个数据包发自 Windows 电脑还是安卓手机等等。接下来把所有 HTTP 头中的 UA 都改得一样。
有两种方法来修改 UA,二选一即可。另外,修改 UA 还会导致其它的异常状况,稍等我会说明如何设置例外。
使用 Privoxy 修改 UA
不推荐。这个方法很简单,但是会导致 HTTP 协议的内容传输缓慢(比如 QQ 发送图片会特别慢,有的下载也会特别慢)。但是我还是把它列出来吧,因为确实很容易配置。
接下来,会安装好 Privoxy 并正确配置,然后将所有 HTTP 流量转发给 Privoxy 代理,并在 Privoxy 中替换 UA。
-
安装 Privoxy。进入路由器管理页面,点击 System -> Software(软件包)。
- 点击 Update lists(刷新列表)按钮,等待几分钟。如果提示好几条“Signature check passed”那么这一步执行成功;如果卡死了,几分钟后再进入这个页面,看到了很长很长的软件列表,那也是成功了。要是老不成功,可能是晚上网络太差了,白天上网人少的时候试试。
- 在 Filter(过滤器)中填写
luci-app-privoxy,点击 Find package(查找软件包)按钮。点击下方“luci-app-privoxy”对应的 Install(安装)按钮。如果提示好几条“Configuring xxxx”,那么就是执行成功了;如果卡死后再进入管理页面,看到有一个 Services(服务)菜单,菜单里有 Privoxy WEB proxy(Privoxy 网络代理),那也是成功了。
-
配置 Privoxy 设置。点击 Services -> Privoxy WEB proxy。
- Files and Directories(文件和目录):Action Files 删除到只剩一个框,填入
match-all.action。Filter files 和 Trust files 均留空。 - Access Control(访问控制):Listen addresses 填写
0.0.0.0:8118,Permit access 填写192.168.0.0/16。Enable action file editor 勾选。 - Miscellaneous(杂项):Accept intercepted requests 勾选。
- Logging(日志):全部取消勾选。
点击 Save & Apply。
- Files and Directories(文件和目录):Action Files 删除到只剩一个框,填入
-
配置防火墙转发。点击 Network -> Firewall(防火墙),然后点击 Custom Rules 标签,在大框框里另起一行,添加下面的代码:
iptables -t nat -N http_ua_drop
iptables -t nat -I PREROUTING -p tcp --dport 80 -j http_ua_drop
iptables -t nat -A http_ua_drop -d 0.0.0.0/8 -j RETURN
iptables -t nat -A http_ua_drop -d 127.0.0.0/8 -j RETURN
iptables -t nat -A http_ua_drop -d 192.168.0.0/16 -j RETURN
iptables -t nat -A http_ua_drop -p tcp -j REDIRECT --to-port 8118
点击 Restart Firewall(重启防火墙)按钮。
- 使用 Privoxy 替换 UA。在路由器的局域网中打开
http://config.privoxy.org/edit-actions-list?f=0,点击 Edit 按钮。Action 那一列中,hide-user-agent 改选为 Enable(绿色),在右侧 User Agent string to send 框中填写Privoxy/1.0;其它全部选择为 No Change (紫色)。点击 Submit 按钮。
使用 XMURP-UA 修改 UA
接下来需要下载我写好的代码,在 Linux 下将它编译后上传到路由器,然后安装好。但是大部分人并不熟悉 Linux 或者懒得装 Linux,所以你可以把你的路由器的型号、硬件版本、OpenWrt 版本发给我(QQ:897331845),我编译好软件包后发给你,然后你按照下面的方法安装:
-
在电脑上安装 WInSCP。在官网下载,使用默认选项安装好就行了。
-
打开 WinSCP,文件协议选择“SCP”,主机名填写管理页面地址,端口号填写
22(默认应该就是),用户名填写root,密码填写你的管理员密码,点“登录”连接到路由器。如果出现警告,继续就可以了。 -
WinSCP 窗口右半边展示的就是路由器上的文件了;双击第一行的
..是返回上一层目录。把我发给你的文件(kmod-xmurp-ua-xxxx.ipk)复制到路由器的根目录(最上层目录)的tmp文件夹下,不要改名。 -
然后点击靠近左上角的一个黑方块(鼠标指上去会提示“打开终端”),打开“控制台”,输入以下命令并点击“执行”:
opkg install /tmp/*.ipk执行完就可以关掉 WinSCP 了。
-
浏览器打开路由器管理页面,选择 System(系统)->Kernel Log(内核日志),在最后几行看到有类似这样的句子:
[xxxx.xxxx] xmurp-ua: Started.
[xxxx.xxxx] xmurp-ua: nf_register_hook returnd 0.
这说明模块已经被成功加载。
-
对于较新的 OpenWrt,在 Network -> Firewall(防火墙)中,可能有流量分载(offloading)的开关。如果有,不要勾选。如果确实需要启用流量分载(大概就是 nat 加速,具体我也不熟悉),可以在防火墙的自定义规则中加入:
iptables -t filter -I FORWARD -p tcp ! --dport 80 -m conntrack --ctstate RELATED,ESTABLISHED -j FLOWOFFLOAD --hw
如果你执意要自己编译,那么下面是步骤。
-
在电脑上安装一个 64 位的 Linux 系统。安装成虚拟机或双系统都可以。推荐使用 Win10 的 Ubuntu 子系统(WSL)。
-
安装编译依赖项。
sudo apt-get update && sudo apt-get install git-core build-essential libssl-dev libncurses5-dev unzip gawk subversion mercurial ccache tar ssh -
下载 SDK。
不同路由器、不同系统版本,SDK 都是不同的。官方 OpenWrt 的 SDK 和固件放在同一个目录下;删掉 OpenWrt 固件下载链接最后的文件名,将剩余的部分复制到浏览器地址栏,回车,拉到最下面,就可以看到 SDK 的下载地址了。比如,WNDR4300 的固件下载地址为:
http://downloads.openwrt.org/releases/18.06.1/targets/ar71xx/nand/openwrt-18.06.1-ar71xx-nand-wndr4300-ubi-factory.img打开网站:
http://downloads.openwrt.org/releases/18.06.1/targets/ar71xx/nand/就可以找到对应 SDK 的下载地址。
下载好 SDK 后,放到用户目录下,解压 SDK 并进入。
cd ~ && tar xvf *.tar.xz && cd openwrt-sdk*如果使用 WSL,可以将 SDK 放到 C 盘根目录,然后使用命令
cd ~ && cp /mnt/c/*.tar.xz .将它复制到 WSL 中。 -
下载
xmurp-ua的源代码,并编译。git clone https://github.com/CHN-beta/xmurp-ua.git package/xmurp-ua make package/xmurp-ua/compile V=sc如果弹出来一个菜单,按左右键选择 Exit,回车;然后选择 Save,回车;即可继续。
如果编译失败(使用 LEDE 的 SDK 时),可能需要在编译时增加一些参数,参考这篇文章;也可能是我的代码有误(没有适配你的路由器内核),请反馈给我。
-
将编译好的软件包上传到路由器,安装。
逐行执行:
scp bin/targets/*/*/packages/*.ipk root@192.168.1.1:/tmp ssh root@192.168.1.1 "opkg install /tmp/*.ipk"其中的
192.168.1.1换成你自己的管理页面地址。如果提示是否继续,输入 yes 即可。还会提示输入密码,输入路由器的管理员密码即可。如果使用 WSL,也可以复制出来到 Windows,再上传到路由器、安装。
确认效果
打开 ua.chn.moe,网页上应该显示 Privoxy/1.0(如果使用 Privoxy 修改 UA)或 XMURP/1.0(如果使用 XMURP-UA 修改 UA)。
对于使用 XMURP-UA 修改的情况,如果没有专门设置例外,并且确实没有修改成功的话,考虑是否是 mark 冲突了;也就是说,别的模块设置了 mark 的第九位,导致我的模块将这些流量当成例外而放行(具体看下文)。如果出现这样的情况,可以在内核日志中找到这样的句子:
[xxxx.xxxx] xmurp-ua: Mark matched. Note that all packages with the mark will be ACCEPT without modify.
[xxxx.xxxx] xmurp-ua: If the mark is not set manually, it maybe a conflict there. Find out which app is using the desired bit and let it use others, or modify and recompile me.
解决方法也是如上所述。
设置例外
修改 UA 后会导致一些异常,比如 WeGame 和腾讯游戏下载器无法下载,“校友邦”无法登陆,还有人反馈 GTA5(好像是叫这个名字)不能玩。建议给自己局域网内的电脑都设置例外。
对于使用 XMURP-UA 修改的情况,只需要在防火墙自定义规则中,另起一行,加上下面的代码(其中的 01:23:45:67:89:AB 替换为自己电脑的 MAC 地址),点击“重启防火墙”,那么来自这台电脑的 HTTP 头 UA 就不会被修改;将命令删除或者在前面加一个#,点击“重启防火墙”,就可以恢复。
iptables -t mangle -A PREROUTING -p tcp --dport 80 -m mac --mac-source 01:23:45:67:89:AB -j MARK --set-xmark 0x100/0x100 对于 Windows 系统,在命令提示符中输入 ipconfig -all 并回车,“物理地址”一项就是 MAC 地址。
如果需要临时将所有的流量都设置为例外:
iptables -t mangle -A PREROUTING -p tcp -m tcp --dport 80 -j MARK --set-xmark 0x100/0x100 如果你稍稍了解 iptables 命令,就可以看明白我在干什么;如果不了解,也可以照葫芦画瓢。
对于使用 privoxy 修改的情况,则是在防火墙自定义规则中增加类似于下面的内容:
iptables -t nat -I http_ua_drop -m mac --mac-source 01:23:45:67:89:AB -j RETURN 使用 SRUN3 拨号
学校给的客户端其实是使用 SRUN3 拨号而不是 SRUN2,只是 SRUN3 在普通路由器上无法实现,SRUN2 在厦大恰好也可以拨通,就用它了。对于 OpenWrt,稍稍修改拨号脚本后就可以使用 SRUN3 拨号。最近,用 SRUN2 拨号经常会掉线几分钟,SRUN3 就没问题,不确定是学校故意搞的鬼还是巧合。
下面是用 SRUN3 拨号的步骤:
-
修改拨号脚本。WinSCP 连接到路由器后,打开文件
/lib/netifd/proto/ppp.sh,这个文件就是拨号的脚本了。搜索username关键字,可以找到这样一句:{username:+user "username" password "password"} \ ``` 把它修改成: ```bash {username:+user "(echo -e username)" password "$password"} \保存,关闭 WinSCP。
(上面的内容排版有问题,是 gitbook 的 bug,你们知道我想表达什么就行了。)
-
打开管理页面,点击 Network(网络)-> Interfaces(接口),点击“WAN”对应的 Edit 按钮。用户名中的
{SRUN2}需要修改成{SRUN3}\r\n。举例来说,小明原来的用户名是:{SRUN2}5=;645=664789:@cmcc那么,他需要改成:
{SRUN3}\r\n5=;645=664789:@cmcc保存并应用,等待几分钟,就可以正常使用了。
使用 WinSCP 快速配置防共享检测
我忽然觉得这部分太沙雕了,就删了。
参考资料
- 网络基础:
- 校选课“计算机网络与通信”的课件(上课的时候保存的)
- TCP/IP报文头部结构整理
- 检测分享的原理及对策:
- 刷入 OpenWrt:
- 为 iptables 增加修改 IPID 的功能:
- iptables 与 netfilter:
- Netfilter hook:
- NTP 服务器的配置:
- 国家授时中心为什么连最基本的NTP服务都没有?(我在这里找到了好几个好用的 NTP 服务器)
- OpenWrt Project: NTP
- privoxy 的使用:
- 编写、编译 OpenWrt 软件包:
- 其它:
更新记录
- 2018.9.15:修正修改 UA 中的一些错误。
- 2018.9.15:补充使用 LEDE 的 SDK 时可能出现的一些问题。
- 2018.9.16:确认不需要修改 IPID。
- 2018.9.16:改正关于 HWNAT 的说法。
- 2018.9.18:确认不需要做 NTP 服务。
- 2018.9.20:在仅仅修改 UA 的情况下,学校今天中午封掉了我的路由器。赶紧又加载了 NTP 服务和改 IPID/TTL 的内容。看接下来会怎样。
- 2018.10.3:优化 privoxy 配置文件。
- 2018.10.4:将近两个星期过去了。这次确认,不改 IPID 和 TTL,只改 HTTP 的 UA 和 NTP 服务已经足够防止封杀。
- 2018.10.10:整理了一下这篇文章,准备写那篇面向小白的了。
- 2018.10.19(20454):再次整理了一下文章,完成了给小白看的版本。
- 2018.10.22(20505):更改了使用 shadowsocks 翻墙的内容(实际上服务器并没有开 UDP 转发支持,而且我错误地配置了 mwan3,才导致的不稳定)。
- 2018.10.24(20534):改正了教程里的两个小错误。如果之前照着教程走不成功的,可以再试一次。因为自己的疏忽给大家造了麻烦,我深表歉意。另外,学校封路由器,大家生气归生气,但是作为一个高素质的厦大学子,不要说脏话。
- 2018.11.16(20853):发现一些路由器 sysupgrade 和 factory 固件都是
.bin后缀,把这一点改正了。还有的人说升级 OpenWRT 之后路由器就开不了机了,虽然我觉得应该是他操作的问题,但还是加上了不升级的操作方法。另外,应该有人根本不介意路由器偶尔掉线,那这样的话,其实不需要这样复杂地配置。 - 2018.12.15(20C63):解决了 HTTP 下载卡顿的问题。另外把额外配置的那一个部分删掉了,寒假专门写一篇文章吧。
- 2018.12.15(20C64):对操作过程中可能出现的正常的卡死作了说明。补充了用 Privoxy 改 UA 可能导致的一些问题。
- 2018.12.22(20D55):重写了改 UA 时的代码。
- 2018.12.22(20D61):发现 UA 不是 GET 特有的字段,其它情况貌似基本是 POST 了(剩下的请求类型貌似不常用)。出这样的错误,显然就是专业计算机和非专业爱好者的区别吧。
- 2018.12.24(20E13):删掉了改 IP 头的部分,改 UA 的代码也放到了 GitHub。不过这样看起来,这篇文章的主要内容反而不占主要的字数了。
- 2018.12.25(20E24):把整个文章重新整理了一下,把新的方法写了进去。另外,Merry Christmas!
- 2019.1.8(20G24):代码适配新内核、修复 BUG。
- 2019.2.6(21233):把两篇文章合并了(放弃了教会所有小白的念头),删掉了很多废话。
- 2019.2.8(21245):稍稍补充。
- 2019.3.17(22403):博客搬家的过程中哪里被我搞坏了,就复制粘贴到了这里。这是我新博客第一篇不水的文章。
- 2019.3.29(22552):发现原来查看 UA 的网站挂掉了,就自己做了个简易的。
- 2019.4.17(22834):把语言改生动活泼了一些,以及一些其它的小修改。
- 2019.7.6(23261):确认学校不再检测共享。不知道是彻底放弃了阻止网络共享的计划,还是计划在这个暑假再搞个更厉害的。如果是前者那当然好,如果是后者我奉陪到底。
- 2019.9.16(30013):学校又开始查了。我感到兴奋。
- 2019.9.20(30052):发现 xmurp-ua 和 luci-app-shadowsocks 以及 offloading 冲突,所以修改了 mark 位置,增加了关于 offloading 的说明。
- 2019.10.10(30355):源代码中完善了点。增加了 mark 冲突的检查。增加使用了 SRUN3 拨号的方案。
SSH连接永远发起,卡在“服务:pledge:network”
使用ssh连接到我的一台服务器需要超过20秒的时间才能启动。
这与局域网或广域网条件无关,因为连接到本身需要相同的(ssh localhost)。 连接build立之后,与服务器进行交互是非常快的。
使用-v表示在说出“pledge:network”之后连接被卡住了。 此时,身份validation(这里使用密钥)已经完成,如下所示:
... debug1: Authentication succeeded (publickey). Authenticated to myserver.mydomain.com ([xx.xx.xx.xx]:22). debug1: channel 0: new [client-session] debug2: channel 0: send open debug1: Requesting no-more-sessions@openssh.com debug1: Entering interactive session. debug1: pledge: network (…在这里停留15到30秒…)
debug1: client_input_global_request: rtype hostkeys-00@openssh.com want_reply 0 debug2: callback start debug2: fd 3 setting TCP_NODELAY debug2: client_session2_setup: id 0 ...
服务器是CentOS 7.2。 它已经发生在我以前与另一台服务器(是CentOS 7.2),nerver发现解决scheme,并在一段时间后消失的问题…
sshd_config是Ubuntu提供的默认configuration。
到目前为止我已经尝试过:
- 在ssh命令中使用-o GSSAPIAuthentication = no
- 使用密码而不是密钥
- 在sshd_config中使用UsePrivilegeSeparation no而不是yes
测试回复正常速度
Installing Janus on Redhat Enterprise Linux
This article discusses the installation of Janus on a Redhat Enterprise Linux 7 server. The installation process is long and complicated due to the dependencies required for Janus and their lack of inclusion in Yum repositories.
The steps below require come code compiling. The process is simple but may be scary for those who’ve never done it. Compiling code has a side effect hindering the use of Yum. Yum (as a system) only knows about packages installed with yum (and rpm) and therefore cannot see what you’ve compiled and installed manually.
The reason i’ve documented this process is because it was difficult. A client requested that we install Janus on their application server which runs Redhat Enterprise Linux 7. In hindsight i would recommend a dedicated Ubuntu server for this role (the media server, not the web sever).
Janus is a WebRTC server described as “Janus is an open source, general purpose, WebRTC server designed and developed by [Meetecho](http://www.meetecho.com). This version of the server is tailored for Linux systems, although it can be compiled for, and installed on, MacOS machines as well. Windows is not supported, but if that’s a requirement, Janus is known to work in the “Windows Subsystem for Linux” on Windows 10.”
I strongly recommend taking a backup of the system before following the steps in this article. Even better would be to do this on a test system and then on a production system (still with backups or a snapshot that can be reverted to). I’ve sourced CentOS packages to fill the gaps in what Redhat doesn’t supply.
TIP: This biggest sticking point for me was the “libsrtp, libsrtp-devel” software. See below for the section on installing them. It was a matter of doing things in the right order. If what i’ve done doesn’t work for you, try in different ways with different commands such as “yum” versus “rpm -ihv” versus “rpm -Uhv”.
It helps to have EPEL configured.
yum install epel-release
Install as much as possible using the following Yum command. Several of the packages listed in the command below wont be found.
yum install libmicrohttpd-devel jansson-devel \
openssl-devel libsrtp-devel sofia-sip-devel glib-devel \
opus-devel libogg-devel libcurl-devel lua-devel \
pkgconfig gengetopt libtool autoconf automake coreutils \
glib2-devel openssl098e
Throughout this process i have sourced dependencies from “https://pkgs.org/”. The versions that i’ve noted below will obviously change over time so consider the date of this article and the versions available.
The documentation at “https://janus.conf.meetecho.com/docs/README.html” gives guidance on the installation process but not specific to Redhat (or CentOS, etc) and includes content not included here. Consider reading that article if you get stuck.
The following sections start with the name of the dependencies being installed (in bold).
Packages: libmicrohttpd, libmicrohttpd-devel wget http://mirror.centos.org/centos/7/os/x86_64/Packages/libmicrohttpd-0.9.33-2.el7.x86_64.rpm
wget http://mirror.centos.org/centos/7/os/x86_64/Packages/libmicrohttpd-devel-0.9.33-2.el7.x86_64.rpm
rpm -ihv libmicrohttpd-0.9.33-2.el7.x86_64.rpm
rpm -ihv libmicrohttpd-devel-0.9.33-2.el7.x86_64.rpm
Package: libnice wget http://mirror.centos.org/centos/7/os/x86_64/Packages/libnice-devel-0.1.3-4.el7.x86_64.rpm
rpm -ihv libnice-devel
Packages: jansson, jansson-devel wget http://mirror.centos.org/centos/7/os/x86_64/Packages/jansson-2.10-1.el7.x86_64.rpm
wget http://mirror.centos.org/centos/7/os/x86_64/Packages/jansson-devel-2.10-1.el7.x86_64.rpm
rpm -Uhv jansson-2.10-1.el7.x86_64.rpm
rpm -ihv jansson-devel-2.10-1.el7.x86_64.rpm
Packages: libsrtp, libsrtp-devel yum remove gstreamer1-plugins-bad-free
wget http://dl.fedoraproject.org/pub/epel/6/x86_64/Packages/l/libsrtp-devel.1.5.4-3.el6.x86_64.rpm
wget http://dl.fedoraproject.org/pub/epel/6/x86_64/Packages/l/libsrtp-1.5.4-3.el6.x86_64.rpm
rpm -Uhv libsrtp-1.5.4-3.el6.x86_64.rpm libsrtp-devel-1.5.4-3.el6.x86_64.rpm
yum install cheese empathy farstream02 telepathy-farstream totem totem-nautilus
Package: sofia-sip-devel wget -O sofia-sip-1.12.11.tar.gz https://downloads.sourceforge.net/project/sofia-sip/sofia-sip/1.12.11/sofia-sip-1.12.11.tar.gz?r=https%3A%2F%2Fsourceforge.net%2Fprojects%2Fsofia-sip%2Ffiles%2Flatest%2Fdownload&ts=1540078563
tar -xzf sofia-sip-1.12.11.tar.gz
cd sofia-sip-1.12.11
./configure; make; make install
Package: opus-devel wget http://mirror.centos.org/centos/7/os/x86_64/Packages/opus-devel-1.0.2-6.el7.x86_64.rpm
rpm -ihv opus-devel-1.0.2-6.el7.x86_64.rpm
Package: libogg-devel wget http://mirror.centos.org/centos/7/os/x86_64/Packages/libogg-devel-1.3.0-7.el7.x86_64.rpm
rpm -ihv libogg-devel-1.3.0-7.el7.x86_64.rpm
Package: lua-devel wget http://mirror.centos.org/centos/7/os/x86_64/Packages/lua-devel-5.1.4-15.el7.x86_64.rpm
rpm -ihv lua-devel-5.1.4-15.el7.x86_64.rpm
Janus: git clone https://github.com/meetecho/janus-gateway.git
cd janus-gateway
sh autogen.sh
The final step is to compile Janus. This step will end either in success of an explanation of anything missing that you’ll need to install manually.
./configure --prefix=/opt/janus
make
make install
Now you should be able to go into “/opt/janus” and run the following command:
janus -V
Janus WebRTC Server 安装
anus is an open source, general purpose, WebRTC server designed and developed by Meetecho. This version of the server is tailored for Linux systems, although it can be compiled for, and installed on, MacOS machines as well. Windows is not supported, but if that’s a requirement, Janus is known to work in the “Windows Subsystem for Linux” on Windows 10.
For some online demos and documentations, make sure you pay the project website a visit!
To discuss Janus with us and other users, there’s a Google Group called meetecho-janus that you can use. If you encounter bugs, though, please submit an issue on github instead.
Dependencies
To install it, you’ll need to satisfy the following dependencies:
- Jansson
- libconfig
- libnice (at least v0.1.13 suggested, master recommended)
- OpenSSL (at least v1.0.1e)
- libsrtp (at least v1.5 suggested)
- usrsctp (only needed if you are interested in Data Channels)
- libmicrohttpd (only needed if you are interested in REST support for the Janus API)
- libwebsockets (only needed if you are interested in WebSockets support for the Janus API)
- cmake (only needed if you are interested in WebSockets and/or BoringSSL support, as they make use of it)
- rabbitmq-c (only needed if you are interested in RabbitMQ support for the Janus API or events)
- paho.mqtt.c (only needed if you are interested in MQTT support for the Janus API or events)
- nanomsg (only needed if you are interested in Nanomsg support for the Janus API)
- libcurl (only needed if you are interested in the TURN REST API support)
A couple of plugins depend on a few more libraries:
- Sofia-SIP (only needed for the SIP plugin)
- libopus (only needed for the bridge plugin)
- libogg (needed for the voicemail plugin and/or post-processor)
- libcurl (only needed if you are interested in RTSP support in the Streaming plugin or in the sample Event Handler plugin)
- Lua (only needed for the Lua plugin)
Additionally, you’ll need the following libraries and tools:
All of those libraries are usually available on most of the most common distributions. Installing these libraries on a recent Fedora, for instance, is very simple:
yum install libmicrohttpd-devel jansson-devel \
   openssl-devel libsrtp-devel sofia-sip-devel glib2-devel \
   opus-devel libogg-devel libcurl-devel pkgconfig gengetopt \
   libconfig-devel libtool autoconf automake
Notice that you may have to yum install epel-release as well if you’re attempting an installation on a CentOS machine instead.
On Ubuntu or Debian, it would require something like this:
aptitude install libmicrohttpd-dev libjansson-dev \
	libssl-dev libsrtp-dev libsofia-sip-ua-dev libglib2.0-dev \
	libopus-dev libogg-dev libcurl4-openssl-dev liblua5.3-dev \
libconfig-dev pkg-config gengetopt libtool automake - Note: please notice that libopus may not be available out of the box on Ubuntu or Debian, unless you’re using a recent version (e.g., Ubuntu 14.04 LTS). In that case, you’ll have to install it manually.
While libnice is typically available in most distros as a package, the version available out of the box in Ubuntu is known to cause problems. As such, we always recommend manually compiling and installing the master version of libnice. Installation of libnice master is quite straightforward:
git clone https://gitlab.freedesktop.org/libnice/libnice
cd libnice
./autogen.sh
./configure --prefix=/usr
make && sudo make install -
Note: Make sure you remove the distro version first, or you’ll cause conflicts between the installations. In case you want to keep both for some reason, for custom installations of libnice you can also run
pkg-config --cflags --libs niceto make sure Janus can find the right installation. If that fails, you may need to set thePKG_CONFIG_PATHenvironment variable prior to compiling Janus, e.g.,export PKG_CONFIG_PATH=/path/to/libnice/lib/pkgconfig
In case you’re interested in compiling the sample Event Handler plugin, you’ll need to install the development version of libcurl as well (usually libcurl-devel on Fedora/CentOS, libcurl4-openssl-dev on Ubuntu/Debian).
If your distro ships a pre-1.5 version of libsrtp, you’ll have to uninstall that version and install 1.5.x, 1.6.x or 2.x manually. In fact, 1.4.x is known to cause several issues with WebRTC. Installation of version 1.5.4 is quite straightforward:
wget https://github.com/cisco/libsrtp/archive/v1.5.4.tar.gz
tar xfv v1.5.4.tar.gz
cd libsrtp-1.5.4
./configure --prefix=/usr --enable-openssl
make shared_library && sudo make install
The instructions for version 2.x are practically the same. Notice that the following steps are for version 2.2.0, but there may be more recent versions available:
wget https://github.com/cisco/libsrtp/archive/v2.2.0.tar.gz
tar xfv v2.2.0.tar.gz
cd libsrtp-2.2.0
./configure --prefix=/usr --enable-openssl
make shared_library && sudo make install
The Janus configure script autodetects which one you have installed and links to the correct library automatically, choosing 2.x if both are installed. If you want 1.5 or 1.6 to be picked, pass --disable-libsrtp2 when configuring Janus to force it to use the older version instead.
-
Note: when installing libsrtp, no matter which version, you may need to pass
--libdir=/usr/lib64to the configure script if you’re installing on a x86_64 distribution.
If you want to make use of BoringSSL instead of OpenSSL (e.g., because you want to take advantage of --enable-dtls-settimeout), you’ll have to manually install it to a specific location. Use the following steps:
git clone https://boringssl.googlesource.com/boringssl
cd boringssl
# Don't barf on errors
sed -i s/" -Werror"//g CMakeLists.txt
# Build
mkdir -p build
cd build
cmake -DCMAKE_CXX_FLAGS="-lrt" ..
make
cd ..
# Install
sudo mkdir -p /opt/boringssl
sudo cp -R include /opt/boringssl/
sudo mkdir -p /opt/boringssl/lib
sudo cp build/ssl/libssl.a /opt/boringssl/lib/
sudo cp build/crypto/libcrypto.a /opt/boringssl/lib/
Once the library is installed, you’ll have to pass an additional --enable-boringssl flag to the configure script, as by default Janus will be built assuming OpenSSL will be used. By default, Janus expects BoringSSL to be installed in /opt/boringssl — if it’s installed in another location, pass the path to the configure script as such: --enable-boringssl=/path/to/boringssl If you were using OpenSSL and want to switch to BoringSSL, make sure you also do a make clean in the Janus folder before compiling with the new BoringSSL support. If you enabled BoringSSL support and also want Janus to detect and react to DTLS timeouts with faster retransmissions, then pass --enable-dtls-settimeout to the configure script too.
For what concerns usrsctp, which is needed for Data Channels support, it is usually not available in repositories, so if you’re interested in them (support is optional) you’ll have to install it manually. It is a pretty easy and standard process:
git clone https://github.com/sctplab/usrsctp
cd usrsctp
./bootstrap
./configure --prefix=/usr && make && sudo make install -
Note: you may need to pass
--libdir=/usr/lib64to the configure script if you’re installing on a x86_64 distribution.
The same applies for libwebsockets, which is needed for the optional WebSockets support. If you’re interested in supporting WebSockets to control Janus, as an alternative (or replacement) to the default plain HTTP REST API, you’ll have to install it manually:
git clone https://libwebsockets.org/repo/libwebsockets
cd libwebsockets
# If you want the stable version of libwebsockets, uncomment the next line
# git checkout v2.4-stable
mkdir build
cd build
# See https://github.com/meetecho/janus-gateway/issues/732 re: LWS_MAX_SMP
cmake -DLWS_MAX_SMP=1 -DCMAKE_INSTALL_PREFIX:PATH=/usr -DCMAKE_C_FLAGS="-fpic" ..
make && sudo make install -
Note: if libwebsockets.org is unreachable for any reason, replace the first line with this:
The same applies for Eclipse Paho MQTT C client library, which is needed for the optional MQTT support. If you’re interested in integrating MQTT channels as an alternative (or replacement) to HTTP and/or WebSockets to control Janus, or as a carrier of Janus Events, you can install the latest version with the following steps:
git clone https://github.com/eclipse/paho.mqtt.c.git
cd paho.mqtt.c
make && sudo make install - Note: you may want to set up a different install path for the library, to achieve that, replace the last command by ‘sudo prefix=/usr make install’.
In case you’re interested in Nanomsg support, you’ll need to install the related C library. It is usually available as an easily installable package in pretty much all repositories. The following is an example on how to install it on Ubuntu:
aptitude install libnanomsg-dev Finally, the same can be said for rabbitmq-c as well, which is needed for the optional RabbitMQ support. In fact, several different versions of the library can be found, and the versions usually available in most distribution repositories are not up-do-date with respect to the current state of the development. As such, if you’re interested in integrating RabbitMQ queues as an alternative (or replacement) to HTTP and/or WebSockets to control Janus, you can install the latest version with the following steps:
git clone https://github.com/alanxz/rabbitmq-c
cd rabbitmq-c
git submodule init
git submodule update
mkdir build && cd build
cmake -DCMAKE_INSTALL_PREFIX=/usr ..
make && sudo make install -
Note: you may need to pass
--libdir=/usr/lib64to the configure script if you’re installing on a x86_64 distribution.
To conclude, should you be interested in building the Janus documentation as well, you’ll need some additional tools too:
On Fedora:
yum install doxygen graphviz On Ubuntu/Debian:
aptitude install doxygen graphviz
Compile
Once you have installed all the dependencies, get the code:
git clone https://github.com/meetecho/janus-gateway.git
cd janus-gateway
Then just use:
sh autogen.sh to generate the configure file. After that, configure and compile as usual to start the whole compilation process:
./configure --prefix=/opt/janus
make
make install
Since Janus requires configuration files for both the core and its modules in order to work, you’ll probably also want to install the default configuration files to use, which you can do this way:
make configs
Remember to only do this once, or otherwise a subsequent make configs will overwrite any configuration file you may have modified in themeanwhile.
If you’ve installed the above libraries but are not interested, for instance, in Data Channels, WebSockets, MQTT and/or RabbitMQ, you can disable them when configuring:
./configure --disable-websockets --disable-data-channels --disable-rabbitmq --disable-mqtt
There are configuration flags for pretty much all external modules and many of the features, so you may want to issue a ./configure --help to dig through the available options. A summary of what’s going to be built will always appear after you do a configure, allowing you to double check if what you need and don’t need is there.
If Doxygen and graphviz are available, the process can also build the documentation for you. By default the compilation process will not try to build the documentation, so if you instead prefer to build it, use the --enable-docs configuration option:
./configure --enable-docs You can also selectively enable/disable other features (e.g., specific plugins you don’t care about, or whether or not you want to build the recordings post-processor). Use the –help option when configuring for more info.
Building on MacOS
While most of the above instructions will work when compiling Janus on MacOS as well, there are a few aspects to highlight when doing that.
First of all, you can use brew to install most of the dependencies:
brew install jansson libnice openssl srtp libusrsctp libmicrohttpd \
	libwebsockets cmake rabbitmq-c sofia-sip opus libogg curl glib \
	libconfig pkg-config gengetopt autoconf automake libtool
For what concerns libwebsockets, though, make sure that the installed version is higher than 2.4.1, or you might encounter the problems described in this post. If brew doesn’t provide a more recent version, you’ll have to install the library manually.
Notice that you may need to provide a custom prefix and PKG_CONFIG_PATH when configuring Janus as well, e.g.:
./configure --prefix=/usr/local/janus PKG_CONFIG_PATH=/usr/local/opt/openssl/lib/pkgconfig Everything else works exactly the same way as on Linux.
Configure and start
To start the server, you can use the janus executable. There are several things you can configure, either in a configuration file:
<installdir>/etc/janus/janus.jcfg or on the command line:
<installdir>/bin/janus --help

janus 0.7.5

Usage: janus [OPTIONS]...

-h, --help                    Print help and exit
-V, --version                 Print version and exit
-b, --daemon                  Launch Janus in background as a daemon
                              (default=off)
-p, --pid-file=path           Open the specified PID file when starting Janus
                              (default=none)
-N, --disable-stdout          Disable stdout based logging  (default=off)
-L, --log-file=path           Log to the specified file (default=stdout only)
-H  --cwd-path                Working directory for Janus daemon process
                              (default=/)
-i, --interface=ipaddress     Interface to use (will be the public IP)
-P, --plugins-folder=path     Plugins folder (default=./plugins)
-C, --config=filename         Configuration file to use
-F, --configs-folder=path     Configuration files folder (default=./conf)
-c, --cert-pem=filename       DTLS certificate
-k, --cert-key=filename       DTLS certificate key
-K, --cert-pwd=text           DTLS certificate key passphrase (if needed)
-S, --stun-server=filename    STUN server(:port) to use, if needed (e.g.,
							  Janus behind NAT, default=none)
-1, --nat-1-1=ip              Public IP to put in all host candidates,
                              assuming a 1:1 NAT is in place (e.g., Amazon
                              EC2 instances, default=none)
-E, --ice-enforce-list=list   Comma-separated list of the only interfaces to
                              use for ICE gathering; partial strings are
                              supported (e.g., eth0 or eno1,wlan0,
                              default=none)
-X, --ice-ignore-list=list    Comma-separated list of interfaces or IP
                              addresses to ignore for ICE gathering;
                              partial strings are supported (e.g.,
                              vmnet8,192.168.0.1,10.0.0.1 or
                              vmnet,192.168., default=vmnet)
-6, --ipv6-candidates         Whether to enable IPv6 candidates or not
                              (experimental)  (default=off)
-l, --libnice-debug           Whether to enable libnice debugging or not
                              (default=off)
-f, --full-trickle            Do full-trickle instead of half-trickle
                              (default=off)
-I, --ice-lite                Whether to enable the ICE Lite mode or not
                              (default=off)
-T, --ice-tcp                 Whether to enable ICE-TCP or not (warning: only
                              works with ICE Lite)
                              (default=off)
-R, --rfc-4588                Whether to enable RFC4588 retransmissions
                              support or not  (default=off)
-q, --max-nack-queue=number   Maximum size of the NACK queue (in ms) per user
                              for retransmissions
-t, --no-media-timer=number   Time (in s) that should pass with no media
                              (audio or video) being received before Janus
                              notifies you about this
-W, --slowlink-threshold=number
                              Number of lost packets (per s) that should
                              trigger a 'slowlink' Janus API event to users
-r, --rtp-port-range=min-max  Port range to use for RTP/RTCP (only available
							  if the installed libnice supports it)
-B, --twcc-period=number      How often (in ms) to send TWCC feedback back to
                              senders, if negotiated (default=1s)
-n, --server-name=name        Public name of this Janus instance
                              (default=MyJanusInstance)
-s, --session-timeout=number  Session timeout value, in seconds (default=60)
-m, --reclaim-session-timeout=number
                              Reclaim session timeout value, in seconds
                              (default=0)
-d, --debug-level=1-7         Debug/logging level (0=disable debugging,
                              7=maximum debug level; default=4)
-D, --debug-timestamps        Enable debug/logging timestamps  (default=off)
-o, --disable-colors          Disable color in the logging  (default=off)
-M, --debug-locks             Enable debugging of locks/mutexes (very
                              verbose!)  (default=off)
-a, --apisecret=randomstring  API secret all requests need to pass in order
                              to be accepted by Janus (useful when wrapping
                              Janus API requests in a server, none by
                              default)
-A, --token-auth              Enable token-based authentication for all
                              requests  (default=off)
-e, --event-handlers          Enable event handlers  (default=off)
Options passed through the command line have the precedence on those specified in the configuration file. To start the server, simply run:
<installdir>/bin/janus This will start the server, and have it look at the configuration file.
Make sure you have a look at all of the configuration files, to tailor Janus to your specific needs: each configuration file is documented, so it shouldn’t be hard to make changes according to your requirements. The repo comes with some defaults (assuming you issues make configs after installing the server) that tend to make sense for generic deployments, and also includes some sample configurations for all the plugins (e.g., web servers to listen on, conference rooms to create, streaming mountpoints to make available at startup, etc.).
To test whether it’s working correctly, you can use the demos provided with this package in the html folder: these are exactly the same demos available online on the project website. Just copy the file it contains in a webserver, or use a userspace webserver to serve the files in the html folder (e.g., with php or python), and open the index.html page in either Chrome or Firefox. A list of demo pages exploiting the different plugins will be available. Remember to edit the transport/port details in the demo JavaScript files if you changed any transport-related configuration from its defaults. Besides, the demos refer to the pre-configured plugin resources, so if you add some new resources (e.g., a new videoconference) you may have to tweak the demo pages to actually use them.
WebRTC服务器开源项目汇总
一、重点参考
1.1 知乎
原文链接: http://www.zhihu.com/question/25497090
可以用WebRTC来做视频直播吗?
经常看到WebRTC的点对点的视频, 能不能做一个平台,
让别人通过WebRTC播放视频直播,让粉丝都可以看见? 有什么方案讲讲?
米小嘉:
可以的. webrtc就是浏览器直接有实时视频功能, 不需要额外的插件, 但有可能是浏览器的默认插件
发布于 2014-09-26 9 条评论
刘津玮:
我所在的项目用这个技术两年多了,先说结论:完全可以!
但是,凡事总有但是,也没那么简单。你以为调用几个Chrome的API就能直播了?too simple
楼上 米小嘉 的回答不对,WebRTC用的不是插件,是Chrome自带的功能,是原生js的API,也没有什么浏览器自带的插件。
楼上 煎饼果子社长 的方法也不对,WebRTC的API不仅仅是给你获取本地信源的,
所谓RTC是real time communication的缩写,自然这套API是带传输功能的。
所以获取图像信源之后不应该用websocket发送图像数据,
而是直接用WebRTC的通信相关API发送图像和声音(这套API是同时支持图像和声音的)数据。
所以,正确的方法是什么呢?
1、你得有一个实现了WebRTC相关协议的客户端。比如Chrome浏览器。
2、架设一个类似MCU系统的服务器。(不知道MCU是什么?看这:MCU(视频会议系统中心控制设备))
第一步,用你的客户端,比如Chrome浏览器,通过WebRTC相关的媒体API获取图像及声音信源,
再用WebRTC中的通信API将图像和声音数据发送到MCU服务器。
第二步,MCU服务器根据你的需求对图像和声音数据进行必要的处理,比如压缩、混音等。
第三步,需要看直播的用户,通过他们的Chrome浏览器,链接上你的MCU服务器,并收取服务器转发来的图像和声音流。
先说步骤一,如果你只是做着玩玩,完全可以直接用Chrome浏览器做你的直播客户端。
把摄像头麦克风连上电脑之后,Chrome可以用相关的js的API获取到摄像头和麦克风的数据。
缺点就是如果长时间直播,Chrome的稳定性堪忧,我不是吓唬你。
我们项目的经验是,chrome这样运行24小时以上内存占用很厉害,而且容易崩溃。
第二步,你可能要问,WebRTC可以直接在浏览器之间P2P地传输流,为什么还要有中转的MCU服务器?
因为Chrome的功能很弱,视频的分辨率控制、多路语音的混音都做不了,所以需要MCU参与。
最重要的是,Chrome同时给6个客户端发视频流就很消耗资源了,
所以你如果有超过10个用户收看的话,Chrome很容易崩溃。
第三步就比较简单了,没什么好说的。
最后最后,还是老话题,兼容性。你可以查一下现在支持的浏览器有款,IE据说支持,
但是我们研究了一下好像他用的协议和Chrome不一样,不能互通。firefox和opera情况也不是很理想。
将空:
说的有道理,受益非浅
2015-03-31
Ryan:
mcu类似media Server的角色吧?有点类似red5?
2015-04-04
刘津玮(作者) 回复 Ryan
对,类似red5,但是MCU这货是我们自己写的,所以没那么强大的功能,基本上是要什么功能的时候就自己写一个加上去
2015-04-05
知乎用户
说的很详细,个人确实感觉中间需要个服务器~
2015-04-10
王宇鹏
服务器端有免费或收费的软件吗?
2015-04-12
刘津玮(作者) 回复 王宇鹏
http://lynckia.com 你可以参考一下这个
2015-04-12
孙知乎
受教了
2015-04-13
刘津玮(作者) 回复 孙知乎
受教还不去点赞加感谢?!( ╯#-_-)╯┴—┴
2015-04-13
孙知乎 回复 刘津玮(作者)
(⊙o⊙)…。。已点
2015-04-13
周昌:
我弄一个手机视频直播应用,刚刚上线,基于WebRTC技术,Mesh tree的网络架构,
浏览器之间走P2P Relay, 正在产品迭代中。产品见: http://yacamera.com
发布于 2014-10-01 1 条评论
知乎用户:
1对N的直播, 一般都是服务器转发的吧.
发布于 2014-10-12 添加评论
廖郡:
请问两台电脑,只有一台电脑有摄像头,能不能实现视频传输。WebRTC
发布于 2014-10-24 1 条评论
鲁强:
补充一点,直播应该是流媒体处理及利用上早就有的概念。
WebRTC只是提供了一种可以替换现有的直播系统中的流媒体传输及处理的框架。
同时,其它答案也提到了,做直播或者视频内的服务,很多都会牵涉到对流媒体的Mix处理及转发。
在这里我需要提醒大家,Video相关的mix在webrtc的底层框架中是没有的,
这里有很大的坑,不是那么简单就能填起来的,请大家在做产品预言的时候深入考虑下哦:),
Audio相关的Mix倒是在webrtc的底层音频相关的框架中已经有了,很容易就可以被大家拿来使用
(虽然chrome啥的,都是只用来做p2p)。
用WebRTC来实现一个支持直播的服务是完全可行的,
但是,要做到直播的交互性,以及大规模的并发(比如一个主播,数以千计的观众)这是做直播最需要考虑的问题。
WebRTC在这里点上只是提供了一个流媒体的传输途径包括音频、视频编解码的接入等,
这些都是可以借鉴或者使用它来作为实现直播的一个部分。
但是,只用webrtc,你也只能做一个简单的玩具,做产品的话,
请更多考虑产品的应用场景,用户量,带宽需求,服务器搭设及运维。
发布于 2015-04-16 2 条评论
煎饼果子社长:
完全可以,直播我理解是点对多的方式,需要服务器中转分发。
获取信源就用webrtc获取你的桌面或者某应用的图像,可以选择,webrtc的API中可以设置。
然后用WebSocket发送到你的服务器(不是唯一的办法,只是这种方法试过可行),然后转发。
客户端也是一样的原理,websocket接收,直接用html5自带的就能播放信源。
唯一不足,声源需要用类似方法单独处理,因为桌面只有图像,不过原理相似。
发布于 2015-03-30 添加评论
二、Jitsi视频会议系统
1. 基于WebRTC的多人视频会议
25 July 2014
最近两周在调研和搭建基于WebRTC的多人视频会议系统。目前已经搭建成功,可以在http://jitsi.shengbin.me/试用。
这个系统无需注册和登录,只要多人访问同一个URL(含有系统为每个房间分配的特定ID),就可以进行视频会议。
如果上面那个链接失效,可以尝试国外一个同样的系统:https://meet.jit.si/。
使用视频会议系统需要客户端电脑提供摄像头功能;至于带宽,当然是越大越好了。
下面总结一下该系统的组成。
2. 客户端
客户端是一个Web App的形式,包括HTML、CSS、JavaScript代码组成的网页。HTML和CSS来构造聊天室的界面,JavaScript来实现功能。由于功能比较复杂,JS代码也较多。
通过WebRTC,客户端从用户摄像头获取图像并传给服务器,来实现视频会议。由于WebRTC只在Chrome、Opera、Firefox上支持,而Firefox有相关的bug尚未解决,所以客户端只能运行于Chrome或者Opera浏览器。
3. 服务器
服务器端包含多个部分。下面分别介绍。
Nginx(http://nginx.org/)
Nginx是一个Web服务器,与著名的Apache同类。它的用途是提供网页访问。
Prosody(http://prosody.im/)
Prosody是一个XMPP服务器。XMPP全称是Extensible Messaging and Presence Protocol,即可扩展通信和表示协议。
它是一种即时通信协议,主要是实现文字聊天。
XMPP的前身是Jabber,一个开源的即时通信协议。Jabber被IETF标准化为XMPP。Google Talk用的就是它。
Jitsi-Videobridge(https://jitsi.org/Projects/JitsiVideobridge)
Jitsi-Videobridge用于处理视频传输,也就是视频流在各参与者之间的转发。
如果没有这个组件,各参与者能文字聊天,但无法互相看见。
转发意味着服务器要从N个参与者那里接受视频流,然后给每个参与者发送其他N-1个参与者的视频数据,
这对服务器带宽要求很高。但由于未对视频做任何处理,CPU负载并不高。
Restund(http://www.creytiv.com/restund.html)
这是一个STUN/TURN服务器。STUN是一种NAT穿透技术,用于帮助处在内网的主机确定自己的公网IP和端口,
从而与别的主机建立直接连接(WebRTC中PeerConnection)。
TURN是STUN的增强版,可以在无法穿透NAT进行直连的情况下提供数据的转发。
上述整个系统都是开源的,更多信息可参见相关的GitHub代码库和Jitsi主页。
三、Janus 视频直播系统
前面说过,WebRTC 是用来解决端到端的实时通信问题,也就是说它很适合用在网络电话这种需要双向视频通话的场景上。网上大部分 WebRTC 的 Demo 也都是在页面上放两个 Video,分别来播 localStream 和 RemoteStream。
3.1 无MediaServer的视频直播系统
那么究竟 WebRTC 能否用来实现单向一对多直播呢?当然可以,而且貌似还很简单:
Step1: 首先必须有一个专门负责调用 getUserMedia 采集音视频的页面,我称之为信源服务;
Step2: 打开直播页面时,建立到信源服务的 PeerConnection,并通过 DataChannel 通知信源服务;
Step3: 信源服务收到通知后,通过对应 PeerConnection 的 addStream 方法提供直播流;
Step4: 直播页面监听 PeerConnection 的 onaddstream 事件,将获得的直播流用丢给 Video 播放;
为了方便,我使用了 PeerJS 这个开源项目来验证上面这个过程。
PeerJS 对 WebRTC Api 进行了封装,使用更简单。
它还提供了用来辅助建立连接的 Signaling 服务,在官网注册一个 Api Key 就能用。
也可以通过 PeerJS Server 搭建自己的服务,只需要通过
npm install peer 装好 peer 后,再通过下面这行命令启动就可以了:
peerjs –port 9000 –key peerjs
启动好 Peer Server,在页面中引入 peer.js 就可以开始玩了。
首先, 实现信源服务:
//由于其它端都要连它,指定一个固定的 ID
var peer = new Peer(‘Server’, {
host: ‘qgy18.imququ.com’,
port: 9003,
path: ‘/’,
config: {
‘iceServers’: [
{ url: ‘stun:stun.l.google.com:19302’ }
]
}
});
navigator.getUserMedia({ audio: false, video: true }, function(stream) {
window.stream = stream;
}, function() { /*…*/ });
peer.on(‘connection’, function(conn) {
conn.on(‘data’, function(clientId){
var call = peer.call(clientId, window.stream);
call.on(‘close’, function() { /*…*/ });
});
});
然后,就是直播服务:
//随机生成一个 ID
var clientId = (+new Date).toString(36) + ‘_’ + (Math.random().toString()).split(‘.’)[1];
var peer = new Peer(clientId, {
host: ‘qgy18.imququ.com’,
port: 9003,
path: ‘/’,
config: {
‘iceServers’: [
{ url: ‘stun:stun.l.google.com:19302’ }
]
}
});
var conn = peer.connect(‘Server’);
conn.on(‘open’, function() {
conn.send(clientId);
});
peer.on(‘call’, function(call) {
call.answer();
call.on(‘stream’, function(remoteStream) {
var video = document.getElementById(‘video’);
video.src = window.URL.createObjectURL(remoteStream);
});
call.on(‘close’, function() { /*…*/ });
});
直播页面通过指定 ID 的方式跟信源服务建立端到端连接,
然后通过 DataChannel 告诉信源服务自己的 ID,信源服务收到消息后,
主动把直播流发过来,直播页面应答后播放就可以了。整个过程原理就这么简单,
这里有一个「完整的 Demo」。
看完上面的 Demo,你也许会想原来使用 WebRTC 直播这么简单,随便找台带摄像头的电脑,
开个浏览器就能提供直播服务,那还搞 HLS、RTMP 什么的干嘛。
3.2 Janus视频直播系统应用简介
实际上,现实并没有那么美好,这个 Demo 也就玩玩儿还可以,真正使用起来问题还大着呢!
首先,虽然说在 WebRTC 直播方案中,服务端只扮演桥梁的工作,
实际数据传输直接发生在端到端之间,但前面说过仍然会有 8% 的情况完全不能直连。
要保证服务的高可用性,还是得考虑部署 TURN 这种复杂而昂贵的中转服务。
其次,Chrome 对每个 Tab 允许连接的终端数有限制,最多 256 个。
实际上,在我最新的 Retina Macbook Pro 上,差不多有 10 个连接时,
Chrome 就开始变得无比卡,风扇呼呼地转,内存被吃掉 6G,CPU 一直跑满,
网络吞吐开始忙不过来,直播服务也开始变得极其不稳定。
所以实际使用方案中,一般还是需要 Media Server 的支持,
把「端到多端」变成「端到 Media Server 到多端」的架构。
Media Server 可以有更好的性能和带宽,可以自己实现 WebRTC 协议,
也就有了支持更多用户的可能。
我找到一个名为 Janus 的 WebRTC Gateway,这个开源项目用 C 语言实现了对 WebRTC 的支持。
Janus 自身实现得很简单,提供插件机制来支持不同的业务逻辑,
配合官方自带插件就可以用来实现高效的 Media Server 服务。
Janus 官方提供的 Demo 在这里,我也尝试在我的 VPS 上部署了一套。
Janus 有个 Streaming 插件,可以接受 GStreamer 推送的音视频流,
然后通过 PeerConnection 推送给所有的用户。由于 GStreamer 可以直接读摄像头,
也就不用再走 WebRTC 的 MediaStream 获取视频,这样架构就变成了传统的服务器到端了。
整个过程比较复杂和曲折,这里不写了,有兴趣的同学可以单独找我讨论。
3.3 Janus视频直播系统官网
链接:
http://janus.conf.meetecho.com/
https://github.com/meetecho/janus-gateway
Janus: the general purpose WebRTC server
Janus is a WebRTC Server developed by Meetecho conceived to be a general purpose one. As such, it doesn’t provide any functionality per se other than implementing the means to set up a WebRTC media communication with a browser, exchanging JSON messages with it, and relaying RTP/RTCP and messages between browsers and the server-side application logic they’re attached to. Any specific feature/application is provided by server side plugins, that browsers can then contact via Janus to take advantage of the functionality they provide. Example of such plugins can be implementations of applications like echo tests, conference bridges, media recorders, SIP gateways and the like.
The reason for this is simple: we wanted something that would have a small footprint (hence a C implementation) and that we could only equip with what was really needed(hence pluggable modules). That is, something that would allow us to deploy either a full-fledged WebRTC gateway on the cloud, or a small nettop/box to handle a specific use case.
Janus配置文件詳解
General
基本配置,配置和插件的路徑,日誌輸出方式,運行方式等配置.
| 變量 | 說明 | 示例 |
|---|---|---|
| configs_folder | 配置文件目錄路徑 | configs_folder=/opt/janus/etc/janus |
| plugins_folder | 插件目錄路徑 | plugins_folder=/opt/janus/lib/janus/plugins |
| transports_folder | 傳輸協議目錄路徑,一般是第三方傳輸方面依賴動態庫,默認即可 | transports_folder=/opt/janus/lib/janus/transports |
| events_folder | 事件句柄目錄路徑,一般是第三方事件方面依賴的動態庫,默認即可 | events_folder=/opt/janus/lib/janus/events |
| log_to_stdout | 日誌是否輸出到標準輸出上,默認爲 true | log_to_stdout = false |
| log_to_file | 日誌文件路徑 | log_to_file = /path/to/janus.log |
| daemonize | 是否後臺運行, 默認在前臺運行 | daemonize = true |
| pid_file | pid 文件路徑, pid 文件在 janus 運行是被創建,關閉時刪除 | pid_file = /path/to/janus.pid |
| interface | 使用的接口(在 SDP 中將使用)現在未使用 | interface = 1.2.3.4 |
| debug_level | 記錄日誌等級, 可用值爲 0-7 | debug_level = 4 |
| debug_timestamps | 是否每行日誌顯示時間戳 | debug_timestamps = yes |
| debug_colors | 日誌中是否禁用顏色 | debug_colors = no |
| debug_locks | 是否使能鎖調試(非常詳細) | debug_locks = yes |
| api_secret | 所有 janus 請求必須包含的字符串,由 janus core 接受或驗證, 如果假裝所有的請求在你 的服務器這就有用,不想讓其他應用程序混 亂 | api_secret = janusrocks |
| token_auth | 基於令牌的身份驗證,該機制強迫用戶在所 有的請求中提供有效的令牌,在想要對來自 web 請求進行身份驗證非常有用 | token_auth = yes |
| token_auth_secret | 和 token_auth 一起使用,使用 HMAC-SHA1 簽名令牌, 注意, 沒有該選項, 管理 api 有添加和刪除令牌的操作 | token_auth_secret = janus |
| admin_secret | 所有 janus 請求必須包含的由管理或監控接 收或驗證的字符串,只有在所有可用的傳輸 中使能了管理 api 才需要 | admin_secret = janusoverlord |
| server_name | 這個 janus 實例的公開名, 將出現在 info 請 求 | server_name = MyJanusInstance |
| session_timeout | 會話超時時間,默認 60s | session_timeout = 60 |
| reclaim_session_timeout | 會話回收時間,默認 0s | reclaim_session_timeout = 0 |
| candidates_ti meout | 申請超時時間, 注意設置 0 將被因無效數值 而被忽略 | candidates_timeout = 45 |
| recordings_tmp_ext | 臨時記錄文件名 | recordings_tmp_ext = tmp |
| event_loops | 啓動線程數 | event_loops = 8 |
Certificates
DTLS使用的證書和祕鑰(和所需密碼)生成
| 變量 | 說明 | 示例 |
|---|---|---|
| cert_pem | 證書 | cert_pem=/opt/janus/share/janus/certs/mycert.pem |
| cert_key | 密鑰 | cert_key=/opt/janus/share/janus/certs/mycert.key |
| cert_pwd | 密碼 | cert_pwd = secretpassphrase |
Media
與媒體相關的配置
| 變量 | 說明 | 示例 |
|---|---|---|
| ipv6 | 是否支持 ipv6 | ipv6 = true |
| max_nack_queue | 重新傳輸的 NACK 隊列最大值單位毫秒,默認 500 | max_nack_queue=500 |
| rfc_4588 | 是否支持協商 | rfc_4588 = yes |
| rtp_port_range | 用於 RTP 和 RTCP 的端口的範圍,默認不考慮範圍 | rtp_port_range=20000-40000 |
| dtls_mtu | 啓動 DTLS 的 MTU(默認爲 1200,它自動適應) | dtls_mtu = 1200 |
| no_media_timer | 沒有 media 數據多長時間 janus 通知,單位爲秒默認 1 | no_media_timer=1 |
| dtls_timeout | 定製重傳的頻率,注意較低的 值(例如 100ms)通常會使連接 速度更快時間,但如果用戶的 RTT 很高,則可能無法工作 合理的權衡(通常是 2*最大期 望 RTT) | dtls_timeout = 500 |
NAT
與NAT相關的內容,如果網關位於NAT之後,可以配置STUN/TURN用於收集候選對象的服務器
| 變量 | 說明 | 示例 |
|---|---|---|
| stun_server | STUN 服務器地址 | stun_server = stun.voip.eutelia.it |
| stun_port | STUN 服務器端口 | stun_port = 3478 |
| nice_debug | NAT debug開關 | nice_debug = false |
| full_trickle | 默認 half-trickle | full_trickle = false |
| ice_lite | ICE-Lite 模塊, 默認false | ice_lite = true |
| ice_tcp | 支持 ICE-Lite | ice_tcp = true |
| nat_1_1_mapping | 內外網地址映射 | nat_1_1_mapping = 1.2.3.4 |
| turn_server | Turn 服務器地址 | turn_server = myturnserver.com |
| turn_port | Turn 服務器端口 | turn_port = 3478 |
| turn_type | Turn 服務器IP類型 | turn_type = udp |
| turn_user | 用戶名 | turn_user = myuser |
| turn_pwd | 密碼 | turn_pwd = mypassword |
| turn_rest_api | TURN REST API 地址 | turn_rest_api = http://yourbackend.com/path/to/api |
| turn_rest_api_key | 密鑰 | turn_rest_api_key=anyapikeyyoumayhaveset |
| turn_rest_api_method | 方法 | turn_rest_api_method = GET |
| ice_enforce_list | 設置並傳遞一個逗號分隔 的接口或 IP 地址列表,網 關選擇 | ice_enforce_list = eth0/ ice_enforce_list = eth0,192.168.0.1 |
| ice_ignore_list | 忽略的網關 | ice_ignore_list = vmnet8,192.168.0.1,10.0.0.1 |
Plugins
選擇應該使用哪個插件
| 參數 | 說明 | 示例 |
|---|---|---|
| disable | 禁用插件, 用逗號會隔 | disable = libjanus_rabbitmq.so |
Events
允許您接收來自 Janus happens 的實時事件的事件處理程序
| 參數 | 說明 | 示例 |
|---|---|---|
| broadcast | 所有可用的事件處理程序都是啓用的 | broadcast = yes |
| disable | 禁用的事件 | disable=libjanus_sampleevh.so |
| stats_period | 每個事件處理的統計傳輸的 時間 | stats_period = 5 |